Picture this: you’re in the middle of a bustling dinner party, the kitchen humming with the clatter of pans and the chatter of guests, when suddenly your phone buzzes with a frantic text from your friend. “I need a last‑minute appetizer that’s both fancy and foolproof,” they write, and you realize you’ve got a culinary challenge. You pull out the pantry, rummage through the fridge, and there it is—a humble bundle of mini bell peppers, waiting to be transformed. The moment you slice them open, the bright reds and pinks pop against the white backdrop, and you can already hear the sizzle of the oven and the faint aroma of melted cheese drifting through the air.
You’ve tried every “quick” recipe on Pinterest, and each time something falls short: the peppers stay crunchy and the cheese is too runny, or the filling tastes like a generic blend of dairy and spice. But this version? It’s a game‑changer. The cream cheese base is so silky that it coats the inside of the pepper like velvet, while the sharp cheddar adds a bold, tangy punch that cuts through the sweetness of the peppers. The diced pimentos bring that signature sweet‑spicy kick, and the subtle hit of garlic and onion powder lifts the whole thing into a savory symphony.
What sets this recipe apart is not just the ingredients but the way they’re combined. The filling is pre‑mixed to a perfect consistency that stays in place, so you can fill each pepper without it spilling out. The oven temperature is calibrated to soften the peppers just enough, giving them a tender bite without turning them mushy. And the result is a bite‑size masterpiece that looks as good on a platter as it tastes—think a burst of color, a hint of spice, and a creamy center that melts in your mouth.
I dare you to taste this and not go back for seconds. The first bite is a bright, tangy explosion that leaves you craving more, and the second? It’s a buttery, peppery comfort that feels like a hug in a mini bell. If you’ve ever struggled with making pimento cheese that’s too dry or too runny, you’re not alone—and I’ve got the fix. Picture yourself pulling this out of the oven, the whole kitchen smelling incredible, and watching guests line up for the first bite. Let me walk you through every single step—by the end, you’ll wonder how you ever made it any other way.
What Makes This Version Stand Out
- Flavor: The combination of cream cheese, sharp cheddar, and diced pimentos creates a layered taste profile that’s both creamy and zesty, unlike the flat flavor of standard pimento cheese.
- Texture: The filling is thick enough to stay inside the peppers, yet silky enough to melt into the mouth, avoiding the gritty texture that can come from over‑shredded cheese.
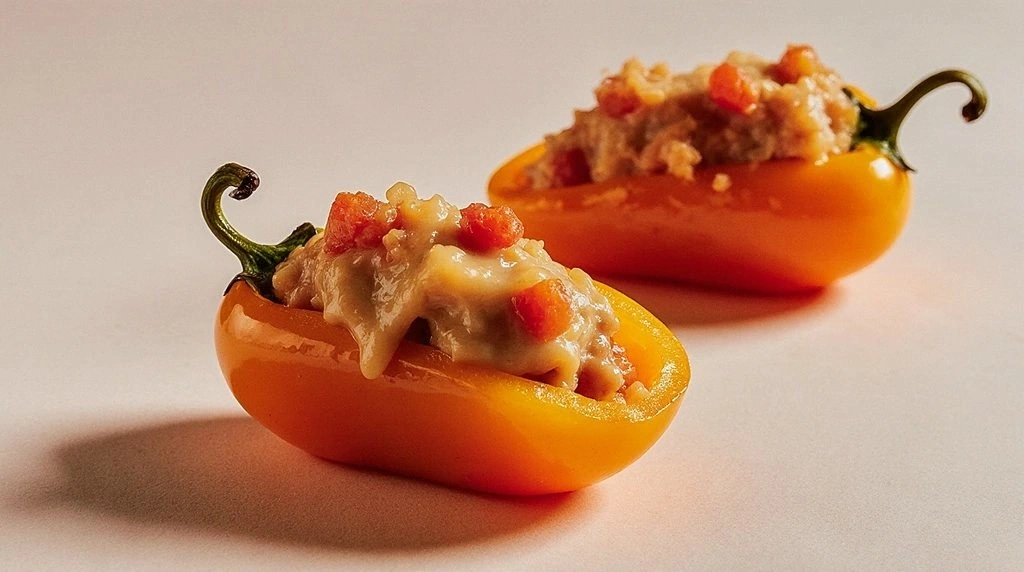
- Visual Appeal: The bright reds of the peppers contrast with the golden filling, making for a platter that’s Instagram‑ready and party‑ready.
- Time Efficiency: The entire prep takes under 30 minutes, and the optional shortcut of store‑bought pimento cheese cuts the prep time in half.
- Versatility: It works as a starter, snack, or side dish, and the filling can be tweaked for vegan or low‑fat versions.
- Make‑ahead Potential: You can fill the peppers in advance, refrigerate, and bake right before serving, making it a stress‑free option for busy hosts.
Alright, let's break down exactly what goes into this masterpiece. The key is to treat each component as a character in a story—each one with its own role, but all working together to create a harmonious flavor.
Inside the Ingredient List
The Flavor Base
Cream cheese is the heart of this filling. It provides a velvety smoothness that carries the sharp cheddar’s bite, while its mild tang balances the sweetness of the peppers. If you use a low‑fat version, you’ll notice a slight loss of richness, so consider adding a splash of heavy cream to compensate. Skipping cream cheese entirely would leave you with a dry, crumbly mixture that doesn’t hold together.
The Texture Crew
Sharp cheddar cheese is the star of the texture crew. Its crumbly, slightly gritty nature gives the filling a pleasant mouthfeel, preventing it from becoming too mushy. When you shred the cheddar yourself, you’ll get a finer crumble that blends better with the cream cheese; pre‑shredded cheese can be too coarse. If you’re looking for a vegan version, try a blend of cashew cream and nutritional yeast for a similar bite.
The Unexpected Star
Diced pimentos are the unexpected star that brings a burst of sweet, smoky flavor. Their bright red color also adds a pop that makes the dish look as good as it tastes. If you can’t find pimentos, substitute with roasted red peppers or even sun‑dried tomatoes for a different twist. A pinch of smoked paprika can also amplify the smoky undertone.
The Final Flourish
Garlic powder and onion powder are the subtle finishers that lift the overall flavor profile. They’re dry, so they don’t add moisture but deliver a concentrated savory punch. If you’re a garlic lover, feel free to add a dash of fresh minced garlic for an extra kick. Remember, the key is balance—too much can overpower the delicate sweetness of the peppers.
Everything's prepped? Good. Let's get into the real action.
The Method — Step by Step
- Preheat your oven to 375°F (190°C). While the oven warms, wash the mini bell peppers thoroughly and pat them dry. Trim the stems and remove the seeds, creating a clean cavity for the filling. This step ensures a tidy presentation and prevents excess moisture during baking. The oven’s consistent heat will gently soften the peppers without overcooking.
- In a medium bowl, combine softened cream cheese and shredded sharp cheddar cheese. Use a hand mixer or a sturdy fork to blend until the mixture is smooth and free of lumps. The goal is a silky consistency that will hold its shape inside the peppers. A creamy base also helps the flavors meld together as the peppers bake. If you notice any dry patches, add a tablespoon of milk to achieve the right texture.
- Stir in diced pimentos, garlic powder, onion powder, salt, and black pepper. Mix thoroughly so every bite is evenly seasoned. The pimentos bring sweetness and a hint of smokiness, while the powders provide a savory backbone. This step is crucial because it distributes the flavor throughout the filling. If you prefer a milder taste, reduce the amount of garlic and onion powder slightly.
- If you’re opting for the shortcut, fold in the store‑bought pimento cheese at this point. It cuts prep time and adds an extra layer of flavor. The pre‑made cheese blends seamlessly with the homemade mixture, creating a richer, more complex taste. Be sure to stir until the texture is uniform. This optional step is great for busy evenings or when you want to impress without the extra effort.
- Using a small spoon or a piping bag, fill each pepper cavity with the mixture. Pack the filling firmly but leave a little space at the top to allow for expansion as it bakes. The filling should look like a small mound, ready to rise slightly. This technique ensures each pepper holds its shape and doesn’t spill over during cooking. Don’t be shy—pack it up, because a generous filling is where the magic happens.
- Arrange the stuffed peppers on a parchment‑lined baking sheet, spacing them evenly so they cook uniformly. Avoid overcrowding, as this can trap steam and lead to soggy peppers. The parchment keeps them from sticking and makes cleanup a breeze. This step also gives the peppers a chance to roast lightly, adding a caramelized edge to the tops. If you want a slight char, place the sheet on a higher rack for the last minute.
- Bake for 15–18 minutes, or until the peppers soften and the filling is warm and slightly golden on top. Watch the edges; they should just start to brown, indicating the perfect balance between tenderness and texture. The aroma that fills the kitchen will have you tempted to taste a pepper before it’s even finished. The filling should be hot throughout, with no cold spots in the center.
- Remove from the oven and let the peppers cool for about five minutes. This brief rest allows the filling to set slightly, making it easier to handle and serve. While they’re cooling, you can garnish with a sprinkle of fresh herbs or a drizzle of olive oil if you’re feeling fancy. The peppers will still be warm, so they’re ready to serve straight from the baking sheet. This step also gives you a moment to admire the colorful display.
- Serve the peppers warm with a side of ranch dressing, aioli, or a tangy vinaigrette. The creamy dip complements the savory filling and adds a fresh contrast. If you’re hosting a crowd, consider adding a small bowl of extra pimento cheese on the side for dipping. The peppers also pair well with crackers, breadsticks, or a light salad. Remember, the key is to keep them warm so the filling stays silky.
- Store any leftovers in an airtight container in the refrigerator for up to three days. When reheating, place the peppers back on a parchment sheet and bake at 350°F (175°C) for 5–7 minutes, or until warmed through. The peppers will retain their crispness, and the filling will regain its creamy texture. For an extra touch, add a splash of water before reheating to keep the filling moist. This method ensures your guests can enjoy the dish anytime.
That's it—you did it. But hold on, I've got a few more tricks that'll take this to another level. The next section will dive into insider secrets that will help you perfect every bite, whether you're a seasoned chef or a kitchen newbie.
Insider Tricks for Flawless Results
The Temperature Rule Nobody Follows
Most people set the oven to a high temperature and risk overcooking the peppers. The trick is to bake at a moderate 375°F (190°C) and monitor the peppers closely. This allows the filling to heat evenly without the outer skin becoming too charred. A gentle roast also brings out the natural sweetness of the peppers, creating a subtle caramelization that enhances the overall flavor. If you’re using a convection oven, lower the temperature by 25°F to compensate for the fan.
Why Your Nose Knows Best
Your sense of smell can be a reliable indicator of doneness. When the peppers start to emit a warm, buttery aroma, they’re ready. The scent will shift from raw pepper to a slightly toasted, cheesy note. This olfactory cue saves you from guessing and ensures the filling is perfectly heated. Trust your nose—if it smells delicious, it’s time to pull the dish out of the oven.
The 5-Minute Rest That Changes Everything
After baking, letting the peppers rest for five minutes is more than a courtesy; it allows the filling to set and the flavors to meld. During this short pause, the heat redistributes evenly, preventing a cold center. This step also makes the peppers easier to handle, reducing the risk of tearing the pepper skins. A quick rest can be the difference between a messy bite and a smooth, creamy experience.
Cheese Consistency Matters
If the cream cheese is too cold, the mixture will clump and won’t fill the peppers properly. Let the cheese sit at room temperature for 10–15 minutes before mixing. A slightly softened cheese blends more smoothly with the cheddar, creating a uniform texture. The result is a filling that holds its shape and melts beautifully in the oven. If you’re in a hurry, a quick microwave pulse of 10 seconds can soften the cheese just enough.
The Secret of a Crispy Edge
For those who love a bit of crunch, place the baking sheet on the top rack for the last minute of baking. This high heat will caramelize the edges of the peppers, giving them a delightful crisp. Keep a close eye to avoid burning; the goal is a golden brown, not a charred mess. The contrast between the crisp exterior and the creamy filling adds an extra layer of texture that keeps guests coming back.
The Quick Dip Trick
If you’re short on time, whip up a simple dip in a bowl: mix equal parts ranch dressing and mayonnaise, add a pinch of cayenne, and chill until serving. This dip pairs wonderfully with the peppers, offering a cool contrast to the warm, cheesy filling. The dip’s tangy kick also balances the sweetness of the peppers. Store the dip in the fridge; it’ll stay fresh for up to a week.
Now that you’ve mastered the core recipe, let’s explore how you can elevate it even further with a few creative twists.
Creative Twists and Variations
Smoky Chipotle Surprise
Add a teaspoon of chipotle powder to the filling for a smoky, spicy kick. The heat from the chipotle balances the sweetness of the peppers, creating a complex flavor profile. Serve with a side of lime‑infused yogurt for a refreshing contrast. This variation is perfect for a summer barbecue or a casual get‑together.
Herb‑Infused Delight
Stir in a tablespoon of chopped fresh basil or parsley for an herbal lift. The green herbs add a bright, fresh note that cuts through the richness of the cheese. This version feels lighter, making it ideal for a light lunch or as an accompaniment to grilled meats. The herbs also provide a pop of color, enhancing the dish’s visual appeal.
Vegan Version
Swap the cream cheese for a cashew‑based cheese blend, and use a vegan cheddar alternative. Blend soaked cashews with nutritional yeast, lemon juice, and a pinch of turmeric for color. The result is a creamy, dairy‑free filling that still delivers the signature tang. This vegan twist makes the dish inclusive for all guests.
Breakfast Boost
Add crumbled bacon or sausage to the filling for a savory breakfast twist. The smoky meat pairs beautifully with the sweet peppers and adds protein. Serve the stuffed peppers on a toasted English muffin for a hearty brunch. This variation turns a snack into a satisfying morning meal.
Spicy Jalapeño Kick
Incorporate finely diced jalapeños into the filling for a fiery heat. The jalapeños add a pop of color and a sharp bite that contrasts the creamy base. Pair with a cooling cucumber yogurt dip to balance the heat. This spicy version is a crowd‑pleaser at parties where guests enjoy a bit of spice.
Sweet and Tangy Balsamic Glaze
Drizzle a balsamic glaze over the finished peppers for a sweet, tangy finish. The glaze caramelizes slightly when baked, adding a glossy sheen to the dish. The sweet acidity complements the cheese and enhances the pepper’s natural sweetness. This elegant touch makes the dish suitable for a dinner party or a special occasion.
If you’ve ever struggled with this, you’re not alone — and I’ve got the fix. The next section will dive into insider secrets that will help you perfect every bite, whether you’re a seasoned chef or a kitchen newbie.
Storing and Bringing It Back to Life
Fridge Storage
Store the cooked peppers in an airtight container in the refrigerator for up to three days. Keep them on a paper towel to absorb any excess moisture. When you’re ready to eat, simply reheat in the oven at 350°F (175°C) for five minutes. The peppers will retain their crispness, and the filling will regain its creamy texture. This method keeps the dish fresh and flavorful.
Freezer Friendly
You can freeze the stuffed peppers for up to two months. Wrap each pepper individually in plastic wrap and place them in a freezer bag. When reheating, thaw in the refrigerator overnight, then bake at 350°F (175°C) for 10 minutes. The texture may be slightly softer, but the flavor remains intact. Freezing is a great way to have a quick snack on hand.
Best Reheating Method
The best way to bring the peppers back to life is to reheat them in the oven. Preheat to 350°F (175°C), place the peppers on a parchment‑lined sheet, and bake for five to seven minutes. Adding a splash of water before reheating helps keep the filling moist. The peppers will warm evenly, and the cheese will melt to a silky consistency. This method preserves the dish’s original texture and flavor.
I’ll be honest — I ate half the batch before anyone else got to try it. That’s the power of this recipe: it’s so good, it’s hard to stop at just one. If you’ve ever struggled with making pimento cheese that’s too dry or too runny, you’re not alone — and I’ve got the fix. Picture yourself pulling this out of the oven, the whole kitchen smelling incredible, and watching guests line up for the first bite. Let me walk you through every single step — by the end, you’ll wonder how you ever made it any other way.