I remember the night my friend dared me to turn a humble batch of cinnamon rolls into something that would make even the most seasoned pastry chef blush. I was halfway through a standard recipe, the dough looking like a soggy cloud, when the oven timer dinged and the sweet scent of vanilla and butter hit me like a warm hug. I stared at that mess, felt a spark of culinary rebellion, and decided it was time for a bold upgrade. That night, I grabbed a box of Oreos, a handful of cocoa, and a generous splash of imagination, and the kitchen became my laboratory for flavor alchemy.
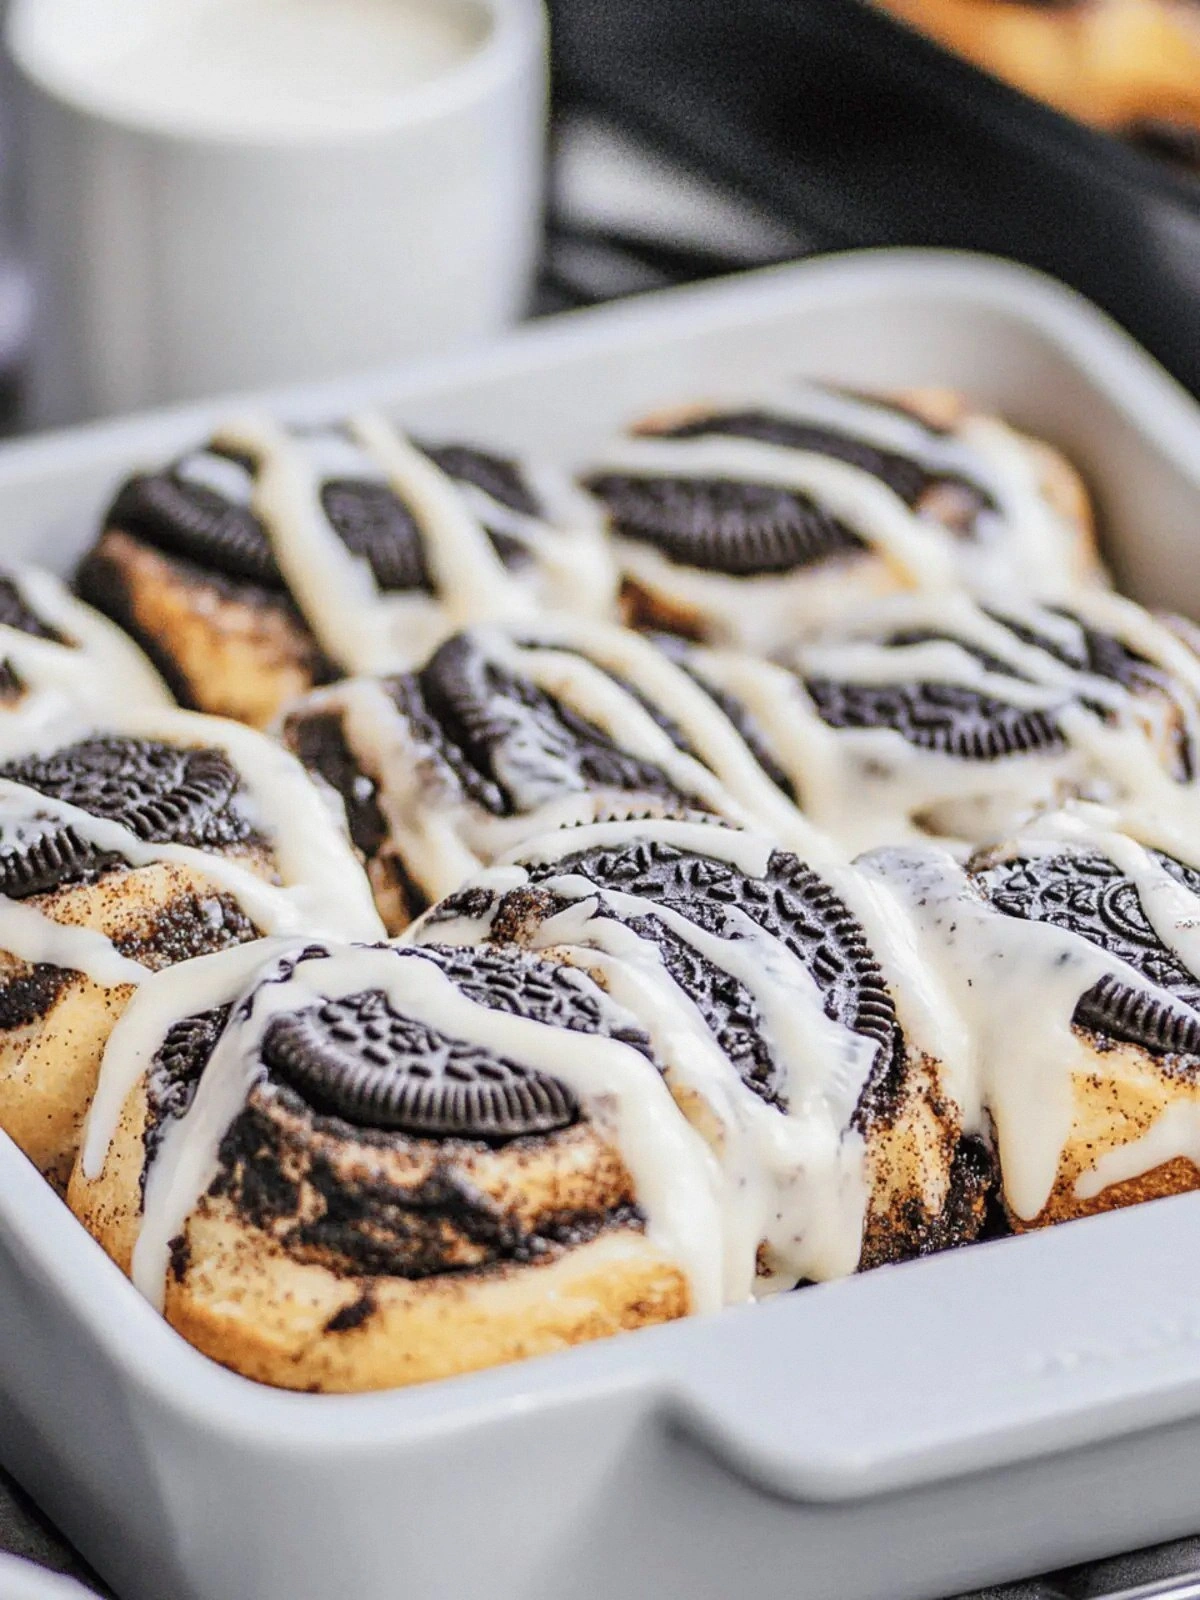
Picture this: the dough is brushed with melted butter, then rolled out like a canvas, spread with a glossy brown sugar and cinnamon mixture, and sprinkled with crushed Oreos that look like tiny, chocolatey stars. As you slide the dough into the oven, the air fills with a perfume that is half caramel, half chocolate, and 100% irresistible. The sound of the first golden rise is a drumbeat that signals that the magic is happening. The heat turns the butter into a silky glaze that coats every roll like velvet, while the Oreos crackle just enough to give you that satisfying crunch. The final product is a swirl of sweet, chocolatey, and buttery goodness that makes you want to taste it and not stop.
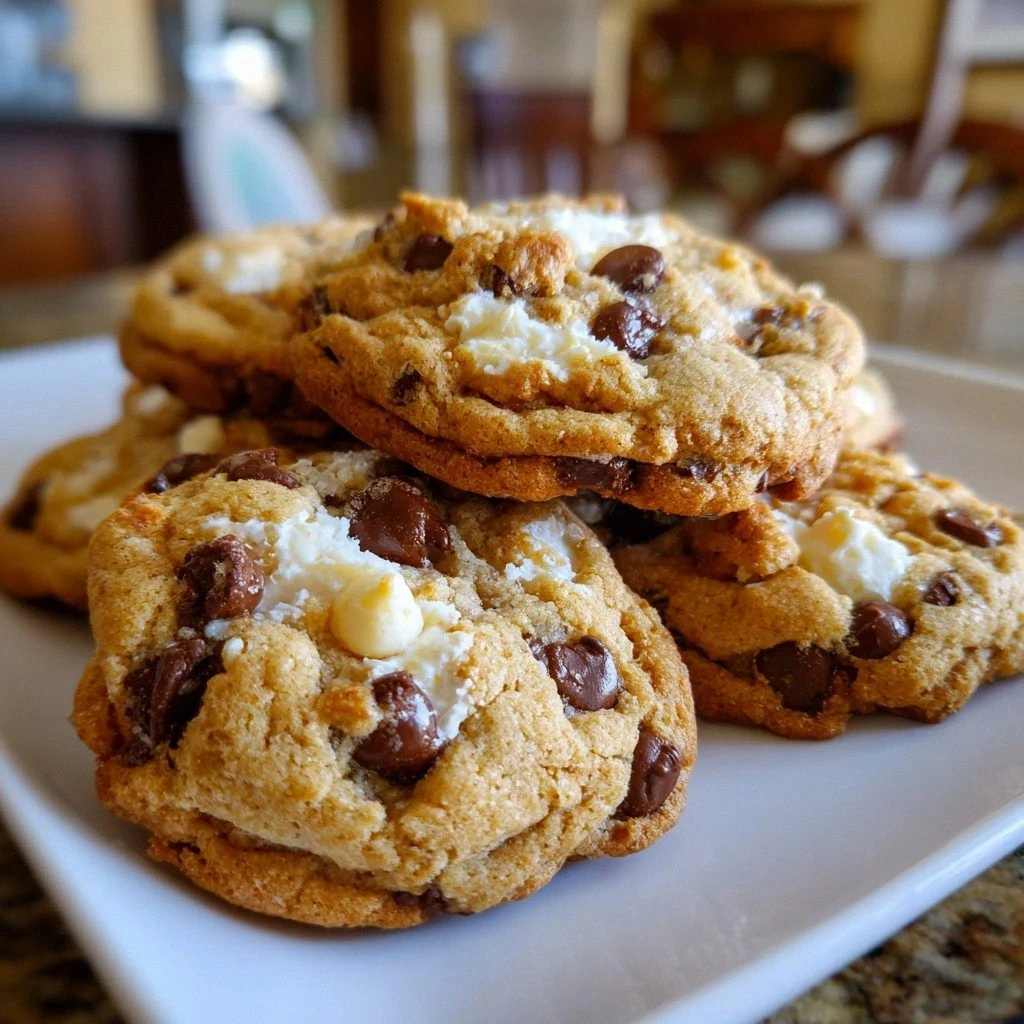
If you’ve ever tried a cookie dough roll and been disappointed by the blandness, this version is hands down the best you’ll ever make at home. The secret? A touch of cocoa in the filling, a generous handful of Oreos, and a frosting that’s as decadent as it is simple. The result is a roll that feels like a dessert, a breakfast treat, and a midnight snack all in one bite. The texture is airy yet chewy, the flavor is layered, and the aroma is so intoxicating it will make the whole house smell like a bakery. This isn’t just another recipe; it’s an invitation to indulge in something truly unforgettable.
I dare you to taste this and not go back for seconds. I’ve had the courage to try this at brunch, dinner parties, and even during a quiet Sunday morning, and every time, the reaction is the same: “Where did you learn that?” The moment you take your first bite, the chocolatey crunch of the Oreos gives way to a melt-in-your-mouth cinnamon sweetness, and the frosting melts into a silky glaze that coats your tongue like a fine silk scarf. That sizzle when it hits the pan? Absolute perfection. And if you’re wondering whether this is a dessert or breakfast, the answer is both—because it’s that good.
Most recipes get this completely wrong by ignoring the balance between sweet and salty, the importance of a proper rise, or the role of butter in achieving that glossy finish. Here’s what actually works: a dough that’s not too sticky, a filling that’s not too sweet, and a frosting that’s light yet flavorful. Picture yourself pulling this out of the oven, the whole kitchen smelling incredible, and the rolls steaming with a golden crust. The anticipation builds, the aroma draws everyone to the counter, and the moment you taste that first bite—ah, that’s the moment of pure, unadulterated bliss. Stay with me here—this is worth it.
What Makes This Version Stand Out
- Flavor Depth: The addition of cocoa and crushed Oreos layers chocolate into every bite, turning a simple cinnamon roll into a rich, dessert-worthy treat.
- Texture Balance: Light, airy dough paired with a crunchy Oreo topping creates a mouthfeel that feels both indulgent and comforting.
- Easy Make‑Ahead: Once the rolls are assembled, you can refrigerate them and bake later without compromising quality.
- Visual Appeal: The glossy butter glaze and chocolate specks give a professional, bakery‑style look that’s Instagram‑ready.
- Ingredient Quality: Using whole milk and unsalted butter ensures the richest flavor while keeping the recipe approachable.
- Crowd Reaction: Friends and family rave about the “Oreo‑cinnamon” twist, making it a guaranteed hit at gatherings.
- Time Efficiency: The dough rises quickly thanks to instant yeast, so you’re not stuck waiting for hours.
- Versatility: It can be served for breakfast, dessert, or a midnight craving, making it a one‑stop solution.
Alright, let's break down exactly what goes into this masterpiece...
Inside the Ingredient List
The Flavor Base
All-Purpose Flour is the backbone of any good dough. It provides structure and a neutral canvas for the other flavors. If you replace it with whole wheat, the rolls will be denser and nuttier, which can be delicious if you enjoy a heartier texture.
Granulated Sugar is the sweetener that balances the richness of butter and the slight bitterness of cocoa. Skipping it would leave the dough bland, and the filling would taste overwhelmingly sweet. A light touch of brown sugar in the dough can add a subtle caramel note.
The Yeast and Leavening Crew
Instant Dry Yeast is the secret to a quick rise. It activates at room temperature, so you don’t need to proof it in warm water. Using fresh yeast would work, but it’s less convenient and can lead to uneven rising.
Fine Salt is essential for flavor development. It also tightens the gluten network, giving the dough a better rise and a tender crumb. Too much salt will overpower the sweetness, so stick to the measured amount.
The Moisture and Fat Mix
Whole Milk adds a creamy richness and helps dissolve the sugar. It also contributes to a softer crumb. If you’re dairy‑free, a plant‑based milk will work, but the texture may be slightly different.
Unsalted Butter is the star of the show, giving the dough its buttery flavor and tender crumb. Using salted butter will alter the flavor profile and make the rolls taste saltier than intended. Melt it just before adding to the dough for best results.
The Egg and Sweetness Boosters
One large Egg binds everything together and adds richness. If you prefer a vegan version, you can replace it with a flaxseed “egg” or a commercial egg replacer.
Light Brown Sugar in the filling adds a deep molasses flavor that complements the chocolate and cinnamon. If you prefer a lighter taste, use an equal amount of white sugar.
The Unexpected Star
Black Cocoa Powder gives the filling a chocolate undertone that’s not overpowering but unmistakable. If you’re a chocolate lover, you can add a pinch more for an intensified flavor.
Ground Cinnamon is the classic spice that ties everything together. It brings warmth and depth. A dash of nutmeg or allspice can add a subtle twist if you’re feeling adventurous.
The Final Flourish
Crushed Oreos are the crowning glory, adding crunch, chocolate flavor, and a playful texture. Use fresh, uncrushed Oreos for a more dramatic appearance, but the crushed version ensures even distribution.
Powdered Sugar is used for the glaze, giving it a smooth, glossy finish. If you’re watching calories, you can reduce the amount or use a sugar substitute.
Vanilla Extract brings a subtle, sweet aroma that ties all flavors together. If you don’t have vanilla, a splash of almond extract will give a different but still delightful note.
Everything's prepped? Good. Let's get into the real action...
The Method — Step by Step
- In a large mixing bowl, combine 3.5 cups of all-purpose flour, 0.25 cups of granulated sugar, 2.25 teaspoons of instant dry yeast, and 1 teaspoon of fine salt. Stir until evenly distributed. This dry mix will form the foundation of your dough. Make sure to sift the flour first to avoid lumps.
- Heat 1 cup of whole milk to about 110°F (43°C), then whisk in 0.25 cups of melted unsalted butter and 1 large egg. The warm milk activates the yeast, while the butter adds tenderness. Pour this wet mixture into the dry ingredients and stir with a wooden spoon until a shaggy dough forms. The dough should be tacky but not overly sticky.
- Turn the dough onto a lightly floured surface and knead for about 5–7 minutes, or until it becomes smooth and elastic. A good test is the windowpane test: stretch a small piece of dough; if it stretches thin without tearing, it’s ready. This step develops gluten, which gives the rolls their structure.
- Place the dough in a greased bowl, cover with a clean towel, and let it rise in a warm spot for 30 minutes, or until it has doubled in size. The dough should puff up like a balloon. This rise is crucial for the airy texture.
- While the dough is rising, prepare the filling: combine 0.5 cups of light brown sugar, 0.25 cups of black cocoa powder, and 1 tablespoon of ground cinnamon in a small bowl. Stir until the mixture is uniform. The cocoa adds a subtle chocolate undertone that pairs beautifully with the cinnamon.
- Once the dough has risen, punch it down and roll it into a rectangle about 12 inches by 9 inches. Spread the brown sugar, cocoa, and cinnamon mixture evenly over the dough. Sprinkle 1 cup of crushed Oreos over the top, pressing them gently into the filling. The Oreos will melt slightly during baking, creating pockets of chocolatey crunch.
- Roll the dough tightly from the longer side, then cut into 12 equal pieces. Place the rolls seam‑side down on a parchment‑lined baking sheet, spacing them about 1 inch apart. This spacing allows the rolls to expand without sticking.
- Cover the rolls with a kitchen towel and let them rise for another 20 minutes. While they rise, preheat your oven to 375°F (190°C). The second rise gives the rolls a fluffy, golden top.
- Bake the rolls for 18–20 minutes, or until they’re golden brown and the tops are slightly crisp. The aroma should fill the kitchen, making your mouth water before you even taste them. Use a toothpick to check doneness; it should come out clean.
- While the rolls are baking, whisk together 1 cup of powdered sugar, 1 teaspoon of vanilla extract, and 2–3 tablespoons of milk to make a glaze. Once the rolls are out of the oven, drizzle the glaze over the tops while they’re still warm so it pools into a glossy finish. Let them cool slightly before serving.
That's it — you did it. But hold on, I've got a few more tricks that'll take this to another level...
Insider Tricks for Flawless Results
The Temperature Rule Nobody Follows
The dough rises best at 110°F (43°C). Many bakers use room temperature milk, which can be too warm and kill the yeast. A quick test: after adding the milk, stir and watch for bubbles forming around the surface; if they appear instantly, you’re good to go. If the milk is too hot, the yeast will die and the dough won’t rise.
Why Your Nose Knows Best
A rising dough will emit a faint yeasty aroma. If you smell nothing, it’s a sign the yeast is inactive. A sweet, yeasty scent indicates the dough is alive and ready for the next step. Trust your nose; it’s a reliable indicator of dough health.
The 5‑Minute Rest That Changes Everything
After the final rise, let the rolls rest for 5 minutes before glazing. This pause allows the steam to settle, preventing the glaze from sliding off. It also gives the rolls a chance to finish cooking gently, ensuring a tender crumb.
Egg Wash for Extra Shine
A light brush of beaten egg over the rolls before baking adds a glossy, golden finish. It also helps the glaze stick better. If you’re vegan, a splash of plant-based milk will give a similar effect.
Keep the Oven Door Closed
Opening the oven door during baking causes a temperature drop that can result in uneven baking. Keep the door closed until the rolls are done. If you need to check, do it quickly and close it as fast as possible.
Cooling Rack Matters
Let the rolls cool on a rack instead of a plate. This allows air to circulate, preventing the bottoms from becoming soggy. The cooling rack also keeps the glaze from pooling at the base.
Creative Twists and Variations
This recipe is a playground. Here are some of my favorite ways to switch things up:
Nutty Crunch
Add a handful of chopped pecans or walnuts to the filling. The nuts provide a delightful crunch and a buttery flavor that complements the chocolate. Serve with a drizzle of honey for a sweet, nutty finish.
Spiced Chocolate
Replace the vanilla extract with a pinch of cayenne pepper or chili powder. The heat pairs unexpectedly well with the chocolate and cinnamon, creating a spicy kick. Great for those who like a bit of adventure.
Minty Fresh
Add a few drops of peppermint extract to the glaze. The mint adds a refreshing contrast to the warm cinnamon and chocolate. This version is perfect for holiday gatherings.
Vegan Version
Swap the butter for coconut oil, use a plant-based milk, and replace the egg with a flaxseed “egg.” The texture will be slightly denser, but the flavor remains rich and comforting. This version is dairy‑free and egg‑free, making it accessible to many.
Coffee‑Infused
Add a teaspoon of instant espresso powder to the filling. The coffee deepens the chocolate flavor and adds a subtle bitter note. Pair with a latte for a decadent brunch.
Almond Delight
Replace the Oreos with crushed almond biscotti for a nutty twist. The biscotti adds a crunchy texture and an almond aroma that pairs beautifully with cinnamon. A drizzle of almond butter glaze elevates the experience.
Storing and Bringing It Back to Life
Fridge Storage
Store the baked rolls in an airtight container at room temperature for up to 3 days. If you have leftovers, keep them in the fridge to preserve freshness. When you’re ready to eat, let them sit at room temperature for 10–15 minutes to restore their softness.
Freezer Friendly
Wrap each roll tightly in plastic wrap and place them in a freezer bag. They will keep for up to 2 months. Thaw overnight in the fridge or at room temperature for best results.
Best Reheating Method
Reheat frozen rolls in a preheated oven at 350°F (175°C) for 10 minutes, or until warm. For fresh rolls, a quick 30‑second microwave burst can work, but be careful not to overheat. Add a tiny splash of water before reheating; it steams back to perfection, keeping the rolls moist.