
Imagine the smell of freshly baked dinner rolls filling your home. This old fashioned recipe has been loved for generations. It has been shared over 382 times, showing its popularity.
To make these rolls, start by activating yeast at 110-115 degrees F. Then, mix and knead the dough for 5 minutes. The dough needs to rise for 1 to 1 1/2 hours until it doubles.
After that, shape the dough into balls and let them rise again for about an hour. You can use bread flour or all-purpose flour. This recipe makes 24-36 big, soft, fluffy rolls perfect for any meal.
Introduction to Old Fashioned Dinner Rolls
Homemade dinner rolls are truly special. You can make them ahead of time and freeze them. This makes them perfect for family dinners and holiday meals. With an easy recipe, you can make fluffy dinner rolls that everyone will love.
Old-fashioned dinner rolls are very versatile. They go well with many meals, from comfort food to fancy holiday feasts. They’re great for any size gathering. You’ll need flour, yeast, and butter, which you likely have at home.
To make perfect dinner rolls, use top-quality ingredients. King Arthur Unbleached All-Purpose Flour is a good choice. You can also add different ingredients, like whole wheat flour or honey, for unique tastes. With a bit of practice, you’ll be making fluffy dinner rolls like a pro.
Here are some benefits of making old-fashioned dinner rolls:
- They can be made ahead of time and frozen for later use
- They’re perfect for family dinners and holiday meals
- They can be customized with different ingredients to create unique flavor combinations
Ingredients You’ll Need
To make the best dinner rolls, you need flour, yeast, and warm water. Choosing high-quality ingredients is key. Good flour makes the rolls tender and tasty. The right yeast ensures they rise well.
For flour, all-purpose is a great choice. It balances strength and softness well. You’ll also need yeast, like RapidRise, for easy and consistent results. For more on yeast, visit unlockallrecipes.com.
Flour: The Foundation of Your Rolls
Flour is the base of your rolls, giving them structure and texture. Keep flour fresh by storing it in a sealed container. Use it within a few months. Try whole wheat or rye for a different taste and texture.
Other Essential Ingredients
You’ll also need warm water, honey or sugar, and butter or oil. The milk you choose matters too. Options include whole milk, almond milk, and buttermilk. Buttermilk adds a tangy flavor and makes the rolls tender. Full-fat buttermilk is best for flavor and moisture.
Equipment Essentials
To make tasty homemade dinner rolls, you need the right tools. A large bowl and a stand mixer are key. A stand mixer makes mixing and kneading easier, giving your rolls a light and fluffy texture.
Choosing the right mixing bowls is important. Stainless steel or glass bowls work best for dough. You’ll also need a measuring cup, whisk, and rubber spatula. For kneading, a stand mixer or a wooden spoon works well.
Must-Have Baking Tools
You’ll also need a baking sheet, parchment paper, and a pastry brush. These are for applying melted butter. A cooling rack is essential for cooling the rolls. If you bake often, a good stand mixer and measuring tools are worth it.
Choosing the Right Mixing Bowls
You’ll also need mixing bowls in different sizes. Look for ones that are easy to clean and durable. Glass or stainless steel bowls are best because they can handle high temperatures and are easy to clean. Stay away from plastic bowls as they can hold smells and tastes.
Step-by-Step Preparation
To make easy dinner rolls, start by mixing the dough. Mix 640g of white bread flour, 2 tsp of sugar, and 2 tsp of active dry yeast in a large bowl. Add 445ml of warm water to activate the yeast. Mix until a smooth dough forms.
Next, knead the dough for 10 minutes until it’s soft and silky. This step is key for fluffy dinner rolls. It helps develop the gluten in the dough. You can use a stand mixer or knead by hand, as you like.
After kneading, put the dough in a greased bowl. Cover it with a damp cloth. Let it rise in a warm place for about an hour or two, or until it doubles in size. This is the first rise, crucial for old-fashioned yeast rolls. Once risen, shape into balls and let rise again for about 45 minutes.
Here are some tips for preparing your dinner rolls:
- Use a consistent temperature and rising time for light and fluffy rolls.
- Don’t overwork the dough to avoid tough rolls.
- Let the rolls cool completely before storing in an airtight container.
Shaping Your Dinner Rolls
Shaping your dinner rolls is key to making them look great. Start by dividing the dough into equal parts. This will help you make classic dinner rolls of the same size.
Roll each piece into a ball and flatten it a bit. This will help you get a disk shape. For traditional dinner rolls, place them in a greased baking dish. Make sure to leave about an inch of space between each roll.
When shaping, keep the dough at room temperature. Use a light touch to avoid overworking. Brush the tops with egg wash or melted butter for a golden finish.
Techniques for Shaping
There are a few ways to shape your dinner rolls. You can use the “fold and tuck” method. This involves folding the dough in half and tucking the edges under.
Or, you can try the “roll and fold” method. Roll the dough into a ball and then fold it in half. This will give you an oblong shape.
Tips for Uniformity
To make your dinner rolls uniform, use a digital scale. This ensures each piece is the same size. Use the same shaping technique for each roll.
Using parchment paper or a silicone mat can also help. It keeps the rolls in shape while they rise and bake.
Second Rise: Getting Ready to Bake
Before baking your old-fashioned yeast rolls, let the dough rise again. This step is key for a light, airy texture. It makes grandma’s dinner rolls so special.
To help the dough rise, place it in a warm, draft-free spot. A temperature of 75°F to 80°F is best. You can also use a proofing box or a warm oven with the light on.
Here are some tips for the second rise:
- Make sure the dough is at room temperature before allowing it to rise.
- Use a lightly oiled bowl or container to prevent the dough from sticking.
- Cover the dough with plastic wrap or a damp towel to maintain humidity.
- Let the dough rise for 20 minutes, or until it has doubled in size.
By following these tips, you’ll make the best dinner rolls. Your old-fashioned yeast rolls will be light, fluffy, and full of flavor, just like grandma’s.
Remember, working with yeast needs patience. Take your time and don’t rush. With practice and patience, you’ll bake delicious homemade dinner rolls soon.
| Ingredient | Quantity |
|---|---|
| Flour | 7 cups |
| Yeast | 4 teaspoons |
| Sugar | 1/2 cup |
| Milk | 2 cups |
| Butter | 3 tablespoons |
Baking Your Dinner Rolls
To make the perfect easy dinner rolls recipe, focus on baking. This is when your fluffy dinner rolls become real. Preheat your oven to 350°F (180°C). Have a baking sheet with parchment paper ready.
When baking old-fashioned yeast rolls, watch the time and temperature closely. Bake for about 20 minutes, or until they’re puffed and shiny. Check if they sound hollow when tapped.
Oven Temperature and Timing
The right oven temperature and timing are key for perfect dinner rolls. Use a thermometer to check your oven’s temperature. As you bake, the rolls will turn into golden, fluffy dinner rolls that impress everyone.
Checking for Doneness
To make sure your old-fashioned yeast rolls are done, tap the bottom of a roll gently. If it sounds hollow, it’s ready. You can also use a food thermometer to check the internal temperature, which should be around 190°F.
Here’s a summary of the baking process in a table format:
| Oven Temperature | Baking Time | Internal Temperature |
|---|---|---|
| 350°F (180°C) | 20 minutes | 190°F |
By following these steps and using the right equipment, you’ll make an easy dinner rolls recipe every time. Store your freshly baked old-fashioned yeast rolls in an airtight container to keep them fresh for a few days.
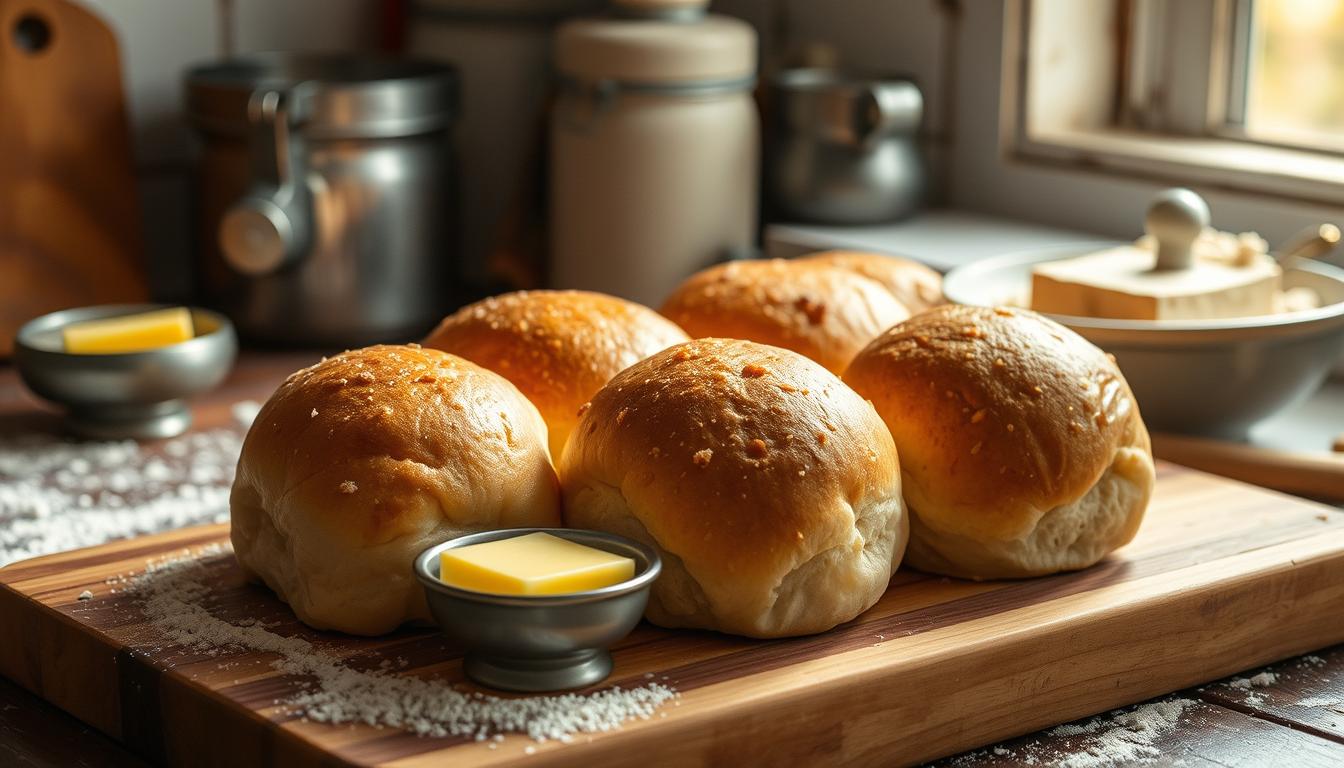
A Buttered Finish
Adding a buttered finish to homemade dinner rolls can really make them stand out. It’s a simple trick that boosts their taste and feel. This trick is key for classic dinner rolls to bring out their deep, traditional taste.
There are many ways to butter your dinner rolls, depending on what you like. Some people melt butter and brush it on. Others use soft butter. For traditional dinner rolls, a light brush of melted butter works best. It keeps their soft texture just right.
Here are some tips for buttering your rolls:
- Use high-quality butter for the best flavor
- Brush the butter on gently to avoid damaging the rolls
- Experiment with different amounts of butter to find your perfect balance
| Buttering Method | Benefits |
|---|---|
| Melted Butter | Easy to apply, rich flavor |
| Softened Butter | Can be more evenly distributed, less messy |
By following these tips and choosing the right buttering method, you can make dinner rolls that everyone will love. They’ll be a hit with your family and friends.
Serving Suggestions
Old-fashioned yeast rolls are great with many dishes. They’re perfect as a side with soups, stews, or grandma’s dinner rolls. This recipe is versatile, fitting well with various meals.
Dinner rolls pair well with comfort foods like soups and stews. Their soft texture contrasts nicely with the savory flavors of these dishes. Try them with creamy tomato soup or hearty beef stew.
Classic Pairings with Dinner Rolls
- Soups: creamy tomato, broccoli cheddar, or butternut squash
- Stews: beef, chicken, or vegetable
- Roasted meats: chicken, beef, or pork
Creative Ways to Enjoy Them
Be creative with your dinner rolls. Use them as sliders bases or side dishes for salads. They’re also great for making sandwiches, like turkey or ham and cheese.

With the best dinner rolls recipe, you can enjoy them in many ways. They’re perfect as a side or as a meal base. So, get creative and find your favorite way to enjoy grandma’s dinner rolls!
| Pairing | Description |
|---|---|
| Soup and Rolls | A classic comfort food combination |
| Rolls and Salad | A fresh and healthy twist on a classic side dish |
| Sliders | A creative way to use dinner rolls as a base for a meal |
Storage Tips
To keep your easy dinner rolls fresh, store them right. Place fluffy dinner rolls in an airtight container at room temperature for up to 3 days. For longer storage, freeze the cooled rolls in a resealable freezer-safe bag for up to 2 months.
Reheat leftovers by wrapping old-fashioned yeast rolls in foil. Bake them in a preheated oven at 350°F (180°C) for 5-7 minutes. Or, reheat them in the microwave for 10-15 seconds until soft and fluffy.
How to Keep Rolls Fresh
Keep dinner rolls fresh by storing them in a cool, dry place. You can also store them in the fridge for up to 5 days. Wrap them tightly in plastic wrap or aluminum foil to prevent drying out.
Reheating Leftovers
Reheating leftovers is easy and convenient. You can reheat the rolls in the oven, microwave, or on the stovetop. Here are some tips for reheating:
- Preheat the oven to 350°F (180°C) and wrap the rolls in foil.
- Bake for 5-7 minutes, or until warmed through.
- Or, reheat the rolls in the microwave for 10-15 seconds, or until soft and fluffy.
By following these storage and reheating tips, you can enjoy your easy dinner rolls recipe, fluffy dinner rolls, and old-fashioned yeast rolls for a longer period.
| Storage Method | Storage Time |
|---|---|
| Airtight container at room temperature | Up to 3 days |
| Freezer-safe bag | Up to 2 months |
| Fridge | Up to 5 days |
Common Mistakes to Avoid
When making homemade dinner rolls, it’s key to know common mistakes. These can ruin your rolls. Whether you’re new or experienced, avoiding these mistakes will make your rolls a hit.
One big mistake is overworking the dough. This makes rolls tough and dense. To fix this, mix ingredients just until they stick together. Then, let the dough rest and rise.
Not giving dough enough rise time is another mistake. This makes rolls flat and not light. But, with enough rise time, you’ll get golden, fluffy rolls.
Other mistakes include using old yeast, too much salt, and overmixing. Being careful about these can help you make tasty, classic dinner rolls. They’ll be a hit at home.
Here are some extra tips to remember:
- Use top-notch ingredients, like fresh yeast and real butter.
- Ensure the dough isn’t too sticky or dry. This affects the rolls’ texture.
- Let the rolls cool completely before serving. This keeps their shape and texture.
Variations on the Recipe
You can make old-fashioned yeast rolls your own by adding herbs and spices. Try adding dried rosemary or thyme for a savory taste.
Adding cheese or garlic to the dough can also enhance flavor. Cheddar, parmesan, or feta cheese are good choices. Minced garlic adds an extra kick.
Herb and Spice Combinations
- Rosemary and olive oil: This combo is perfect for a savory, herby flavor.
- Garlic and parmesan: Great for a cheesy, savory taste.
- Thyme and lemon: Ideal for a bright, citrusy flavor.
Experimenting with ingredients is key to finding the best dinner rolls recipe. With a bit of creativity, you can make delicious, unique old-fashioned yeast rolls that impress everyone.

| Ingredient | Quantity |
|---|---|
| Active dry yeast | 1 package |
| Warm water | ¼ cup |
| All-purpose flour | 2 cups |
Conclusion: Sharing Your Dinner Rolls
Now you know how to make old-fashioned yeast rolls. It’s time to share them with your loved ones. These fluffy dinner rolls are perfect for any gathering. They’re easy to make and will impress your guests.
Each roll has about 145 calories. That’s not too bad. You can even make them vegan by using oil instead of butter. Or add herbs and spices for a special flavor.
Making Memories Around the Table
Sharing a meal is more than food; it’s about making memories. These old-fashioned yeast rolls can make any occasion special. Bake a batch and enjoy the love and warmth of sharing a meal.
Your New Go-To Roll Recipe
This easy dinner rolls recipe is simple and fun. It’s great for both seasoned bakers and beginners. Try it out and see why it’s a favorite. Your taste buds and loved ones will love it.
FAQ
What is the best type of flour to use for old-fashioned dinner rolls?
Use all-purpose flour for old-fashioned dinner rolls. It’s the best mix of strength and softness. Try bread flour or whole wheat for different tastes and textures.
How do I activate yeast for old-fashioned dinner rolls?
Mix yeast with warm water (100°F to 110°F) and a bit of sugar. Wait 5-10 minutes for it to get frothy and bubbly. This step is key for making old-fashioned yeast rolls.
What equipment do I need to make old-fashioned dinner rolls?
You’ll need a big mixing bowl, a measuring cup, a wooden spoon, and a baking sheet. A stand mixer helps with mixing and kneading, making homemade dinner rolls easier.
How long does it take to make old-fashioned dinner rolls from scratch?
Making old-fashioned dinner rolls takes 2-3 hours. Most time is spent letting the dough rise. So, you can still make easy dinner rolls with some planning.
Can I customize old-fashioned dinner rolls with different flavors and ingredients?
Yes, you can add herbs, spices, cheeses, and more to make them your own. Try garlic and herb, cheddar and chive, or cinnamon and sugar for different tastes.
How do I store and reheat leftover old-fashioned dinner rolls?
Store them in an airtight container at room temperature for up to 3 days. Reheat in the oven or microwave. Or freeze them for later, thawing and reheating as needed.
What are some common mistakes to avoid when making old-fashioned dinner rolls?
Avoid overworking the dough, not giving it enough rise time, and using the wrong flour. Follow a trusted recipe to get soft, fluffy, and delicious results.
Can I make old-fashioned dinner rolls ahead of time and freeze them?
Yes, you can freeze them after shaping and rising. Freeze on a baking sheet, then move to a freezer-safe bag or container. Bake as needed.
What are some classic pairings for old-fashioned dinner rolls?
Old-fashioned dinner rolls go well with soups, stews, roasted meats, and veggies. Serve with a warm soup, use for sliders, or as a side dish.