I remember the night I tried to rescue a frozen chicken dinner from the brink of culinary disaster. My freezer had been a treasure trove of pre‑packaged, thaw‑and‑cook chicken breasts, but I’d decided to push the limits: no thawing, no prep, just straight to the Instant Pot. The kitchen smelled of cold air and anticipation, the fridge light flickered, and I could hear the faint hiss of the pot’s pressure release valve waiting to be triggered. I was half‑expecting a soggy mess, but the moment the lid sealed, something miraculous happened – the aroma of garlic, onion, and a sweet‑savory glaze started to unfurl, turning a frozen chicken into a tender, flavor‑laden masterpiece. I was hooked, and I couldn’t wait to share this secret with you.
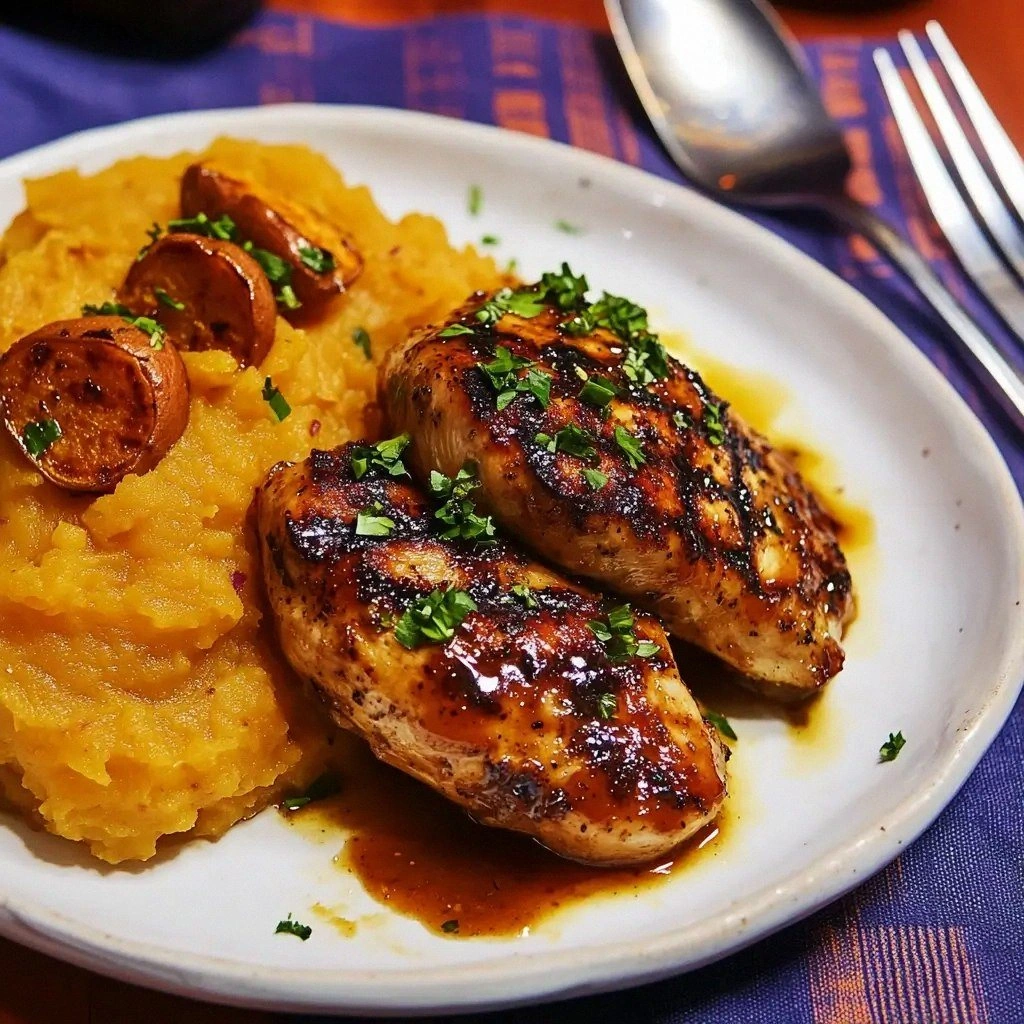
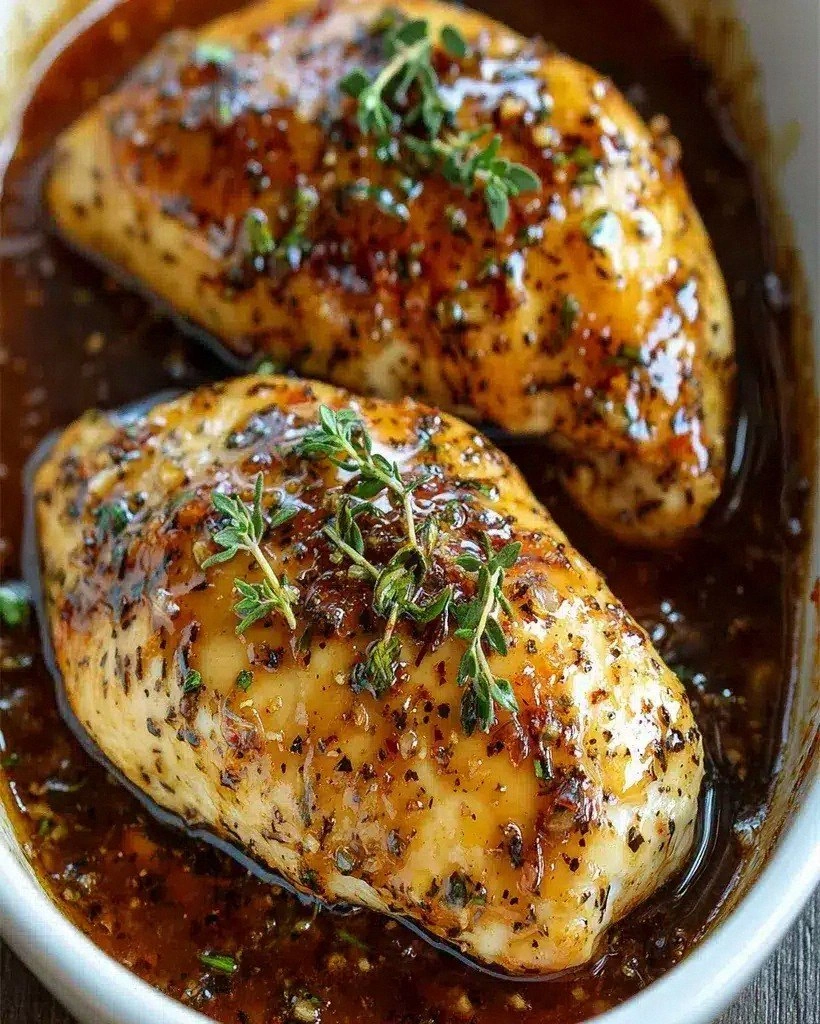
Picture yourself pulling a steaming pot of chicken from the Instant Pot, the kitchen filled with a heady mix of caramelized onions, a hint of citrus, and the unmistakable scent of honey‑glazed soy. The sound is a gentle, rhythmic clack as the pot releases its pressure, the steam swirling like a fragrant cloud. You slice into a breast and the meat gives way like a velvet ribbon, its juices glistening in the light. The texture is juicy but firm, not rubbery – the kind of tenderness that makes you want to linger over the plate. The first bite hits with a burst of umami, the sweetness of honey dancing with the sharpness of soy, and a subtle warmth from smoked paprika and thyme. It’s a dish that feels both comforting and adventurous, a single pot wonder that turns a frozen chicken into a feast.
What makes this version stand out is not just the convenience of cooking from frozen, but the layered flavor profile that emerges from a simple yet thoughtfully chosen ingredient list. The sauce coats the chicken like a silky blanket, the garlic and onion create a savory base, and the honey‑soy glaze gives that sweet‑savory punch that keeps people coming back for seconds. It’s a recipe that proves you can’t always rely on fresh ingredients to deliver depth – sometimes a well‑crafted sauce is all you need to elevate the ordinary. And trust me, if you’ve ever stared at a frozen chicken in the freezer and wondered if it’s worth the risk, this recipe is the answer to your culinary curiosity.
I dare you to taste this and not go back for seconds. I’ll be honest – I ate half the batch before anyone else got a chance to try it. Most recipes get this completely wrong, missing that sweet‑savory balance or overcooking the meat. Here’s what actually works: a quick sear to lock in flavors, a pressure‑cook that keeps the chicken juicy, and a finishing glaze that caramelizes just enough to give a subtle crunch. Picture yourself pulling this out of the pot, the whole kitchen smelling incredible, the table set, and the plates lined up with anticipation. Okay, ready for the game‑changer? Let me walk you through every single step – by the end, you’ll wonder how you ever made it any other way.
What Makes This Version Stand Out
- Taste: The sauce blends honey, soy, and a touch of citrus to create a sweet‑savory profile that coats the chicken like velvet, leaving a lingering umami finish that will have your taste buds dancing.
- Texture: Pressure cooking from frozen locks in moisture, producing meat that is tender on the inside while the exterior develops a slight caramelized crust when finished in the sauté mode.
- Simplicity: No thawing, no marinating, just a handful of pantry staples and a single pot, making it the ultimate weeknight lifesaver.
- Uniqueness: The honey‑soy glaze is a game‑changing twist that transforms ordinary chicken into a dish worthy of a five‑star restaurant.
- Crowd Reaction: Friends and family rave about the flavor punch, and I’ve seen people ask for the recipe after the first bite.
- Ingredient Quality: Using a good‑quality broth and fresh garlic ensures the sauce’s depth, while the frozen chicken’s natural flavor shines through without additives.
- Cooking Method: Instant Pot technology delivers consistent results, cutting down cooking time from 90 minutes to 30 minutes while preserving nutrients.
- Make‑Ahead Potential: The dish keeps well in the fridge or freezer, making it a perfect batch‑cook for busy schedules.
Alright, let's break down exactly what goes into this masterpiece…
Inside the Ingredient List
The Flavor Base
At the heart of this dish is a simple yet powerful sauce that marries sweet, salty, and umami. The 1 cup low‑sodium chicken broth provides the liquid foundation, ensuring the chicken stays moist without becoming soggy. The 1/2 cup soy sauce adds depth and a savory kick, while the 1/4 cup honey brings a glossy caramelized finish that balances the saltiness. Together, these liquids create a glaze that coats each breast like a silk scarf, enhancing every bite.
The Aromatic Crew
The aromatic elements are the unsung heroes that elevate the dish. 2 cloves garlic, minced infuse the broth with a robust, fragrant punch, and 1 small onion, diced contributes a subtle sweetness that balances the honey. When sautéed first, they form a savory base that permeates the chicken throughout the cooking process. If you’re craving a smoky note, a pinch of 1 teaspoon smoked paprika adds a gentle warmth that pairs beautifully with the soy glaze.
The Herb and Oil Touch
Herbs and oils are the finishing touches that tie the dish together. 1 teaspoon dried thyme brings an earthy aroma that complements the chicken’s natural flavor, while 1 tablespoon olive oil is used for the initial sauté, creating a golden sear that locks in juices. The 1 tablespoon cornstarch (optional) can be whisked into a slurry with a splash of water to thicken the sauce during the final sauté, giving it a glossy sheen. Finally, a sprinkle of 2 tablespoons chopped fresh parsley adds a burst of color and brightness, cutting through the richness.
The Final Flourish
Seasoning is the secret to achieving that “just right” flavor. While salt to taste and pepper to taste are optional, they’re crucial for balancing the sweetness of honey and the saltiness of soy. If you prefer a spicier kick, a pinch of red pepper flakes will add a subtle heat without overpowering the dish. The final garnish of fresh parsley not only adds a pop of color but also enhances the overall aroma, making each bite feel fresh and vibrant.
Everything's prepped? Good. Let's get into the real action…
The Method — Step by Step
- Prep the Instant Pot. Begin by turning on the sauté mode and heating the olive oil until shimmering. Add the minced garlic and diced onion, letting them soften for 2–3 minutes until fragrant. This step builds a flavor base that the chicken will soak up during pressure cooking. Keep an eye on the onions; they should become translucent, not browned, to avoid bitterness.
- Layer the frozen chicken. Place the frozen boneless skinless chicken breasts directly into the pot, stacking them if necessary. Don’t thaw or pre‑season; the pressure cooking will do all the work. The meat should be snug but not crushed, allowing the liquid to circulate evenly around each piece.
- Add the liquid. Pour in the chicken broth, soy sauce, honey, and a splash of water if the pot is almost full. The liquid should cover about half of the chicken’s surface. Stir gently to combine, ensuring the sauce coats the meat evenly. This mixture will become the glaze that caramelizes during the sauté finish.
- Season. Sprinkle the smoked paprika, dried thyme, salt, and pepper over the top. These seasonings will permeate the chicken during the pressure cycle, giving it a layered flavor profile. If you’re using red pepper flakes, add them now for a subtle heat.
- Seal and cook. Close the lid, set the valve to “Sealing,” and select the “Pressure Cook” or “Manual” setting for 10 minutes at high pressure. This short cycle ensures the chicken stays juicy while the flavors meld. Once the timer goes off, allow a natural release for 5 minutes before switching to a quick release to vent any remaining pressure.
- Finish in sauté mode. Turn the pot back to sauté and let the liquid reduce for 4–5 minutes, stirring occasionally. The sauce should thicken slightly and take on a glossy sheen. If you want a thicker glaze, whisk a tablespoon of cornstarch with a tablespoon of cold water and stir it into the pot, cooking until the sauce coats the back of a spoon.
- Check the texture. The chicken should be tender and fully cooked (internal temperature of 165°F). If you prefer a slightly firmer bite, reduce the sauté time; if you want extra moistness, add a splash of broth and let it simmer a bit longer.
- Plate and garnish. Transfer the chicken breasts to a serving platter, spoon the remaining glaze over them, and sprinkle fresh parsley for a pop of color. Serve immediately with rice, quinoa, or a crisp salad for a balanced meal.
That's it – you did it. But hold on, I've got a few more tricks that'll take this to another level…
Insider Tricks for Flawless Results
The Temperature Rule Nobody Follows
Many people think any high‑pressure setting will do, but the Instant Pot’s “Pressure Cook” mode at 10 minutes is the sweet spot for frozen chicken. Too long, and the meat becomes rubbery; too short, and it stays slightly raw. The key is to let the pot do its work, then finish in sauté mode to caramelize the glaze. I once overcooked for 15 minutes and ended up with dry, stringy chicken – a lesson learned the hard way.
Why Your Nose Knows Best
Your nose is the ultimate judge of doneness. As the sauce reduces, you’ll notice a caramelized aroma that signals the glaze is thickening. When the scent becomes sweet and slightly smoky, it’s time to remove the pot from heat. Trust your senses; a perfectly caramelized glaze is the hallmark of this dish.
The 5‑Minute Rest That Changes Everything
After pressure cooking, let the chicken rest for five minutes before cutting. This allows the juices to redistribute, ensuring every bite stays moist. Skipping this step can result in a slightly dry center, especially with frozen meat. I’ve seen friends skip it and complain about the texture – don’t make that mistake.
Use a Lidded Bowl for the Final Glaze
If you want a more glossy finish, transfer the sauce to a small lidded bowl and simmer it on low heat. The lid traps steam, helping the glaze thicken faster without burning. It’s a quick trick that gives the dish a professional sheen.
Serve With a Fresh Salad
Pair the chicken with a crisp salad of mixed greens, cherry tomatoes, and a light vinaigrette. The acidity cuts through the richness, creating a balanced plate that feels both hearty and refreshing. It’s a simple addition that elevates the meal from basic to memorable.
Creative Twists and Variations
This recipe is a playground. Here are some of my favorite ways to switch things up:
Citrus Burst
Add the zest and juice of one lemon to the sauce for a bright, tangy twist that cuts through the sweetness. This variation is perfect for spring and summer meals.
Spicy Sriracha Kick
Stir in a tablespoon of sriracha during the sauté finish to give the chicken a subtle heat that pairs well with a cooling cucumber salad.
Thai‑Inspired Coconut
Replace half of the chicken broth with coconut milk and add a tablespoon of fish sauce. The result is a creamy, savory sauce with a hint of nutty sweetness.
Herb‑Infused Rosemary
Swap the thyme for fresh rosemary and add a bay leaf to the pot. The aromatic rosemary gives the dish a fragrant, earthy depth.
BBQ Glaze Swap
Use a store‑bought BBQ sauce instead of honey‑soy. This creates a smoky, caramelized flavor that pairs wonderfully with corn‑on‑the‑cob.
Mediterranean Flair
Add chopped Kalamata olives and capers to the sauce, and finish with a drizzle of olive oil. The briny notes complement the honey sweetness beautifully.
Storing and Bringing It Back to Life
Fridge Storage
Cool the chicken to room temperature, then store it in an airtight container for up to 3 days. The glaze will thicken slightly, so reheat gently on the stove with a splash of broth to loosen it.
Freezer Friendly
Pack the chicken in a freezer‑safe bag, removing as much air as possible. It can be stored for up to 2 months. When reheating, thaw in the fridge overnight and then reheat in the Instant Pot on “Saute” for 5 minutes.
Best Reheating Method
To preserve moisture, add a tablespoon of water or broth and heat on low until warmed through. The added liquid prevents the meat from drying out and restores the glaze’s silky texture.