I still remember the night the kitchen turned into a battleground of flour clouds and burnt sugar. I’d been bragging to friends about my “next‑level” donut game, but the first batch collapsed like a paper crane. The dough was either too dry and crumbly or so sticky it clung to my hands like a second skin. The result? A batch of half‑cooked, doughy lumps that tasted like cardboard. I laughed, I cried, and I swore I’d never again let a donut ruin my Sunday. That night, I decided to rewrite the donut rulebook, and what emerged was a recipe that would make every donut lover swoon.
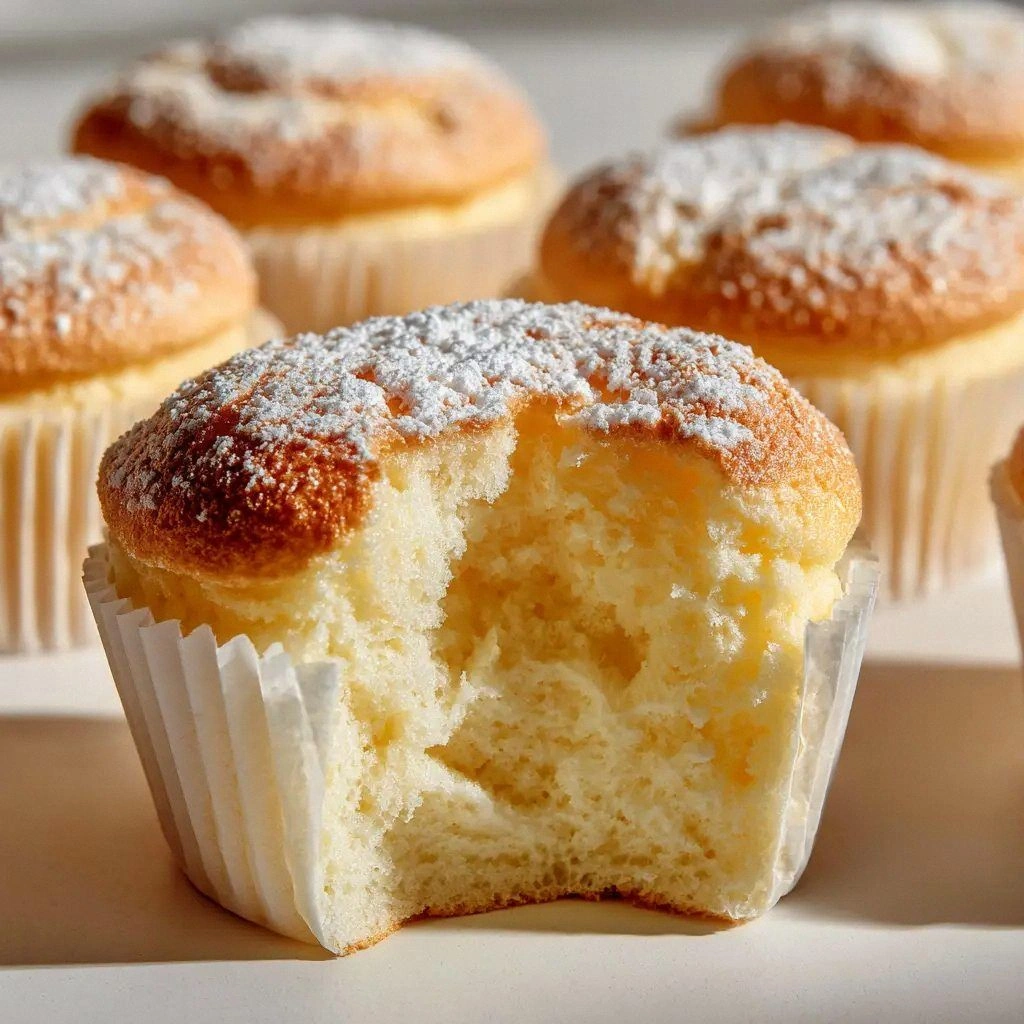
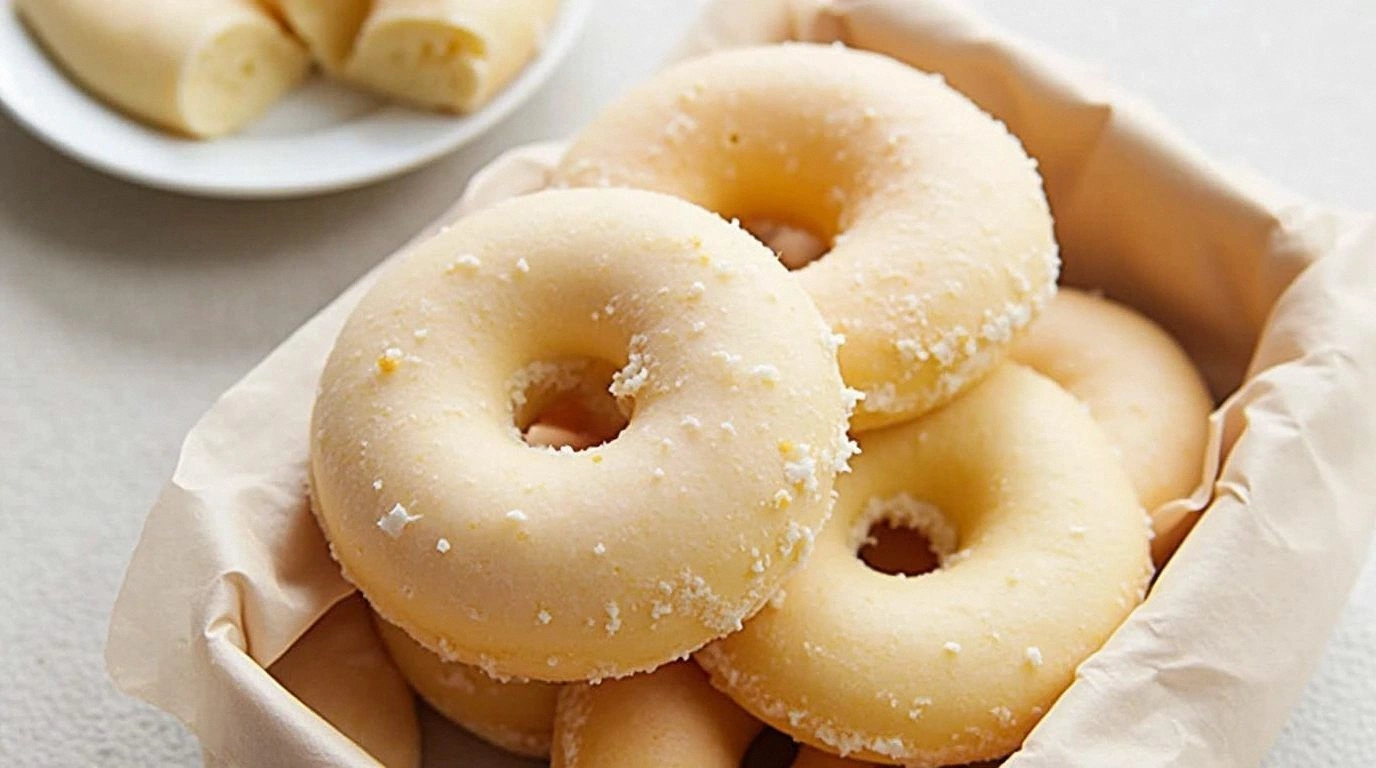
Picture this: a golden ring of dough, crisp on the outside, pillowy on the inside, and glazed with a sugary coating that clings like a second skin. The aroma that fills the kitchen is a warm, buttery scent that lingers long after you finish the last bite. The sound of the first donut hitting the hot oil is a satisfying sizzle, and the texture is a harmonious blend of crunch and melt. The taste—sweet, slightly yeasty, with a hint of vanilla—creates an instant nostalgia that feels like a hug from your grandma’s kitchen.
What makes this version stand out? It’s not just the classic yeast dough; it’s the meticulous attention to each component—flour quality, yeast activation, temperature control, and that secret glaze trick that gives the donuts a glossy finish. I dared you to taste this and not go back for seconds. This is hands down the best version you’ll ever make at home. I’ll be honest—after I finished the first batch, I ate half the donuts before anyone else got a chance. If you’ve ever struggled with donuts that are either too dense or too greasy, you’re not alone, and I’ve got the fix.
Most recipes get this completely wrong. They either forget to proof the yeast or fry at the wrong temperature, leading to doughy centers or burnt exteriors. Here’s what actually works: a balanced ratio of flour to liquid, a precise proofing time, and a controlled frying temperature. Picture yourself pulling a batch of freshly fried donuts from the pan, the whole kitchen smelling incredible, and your friends gathering around, eager to taste. Stay with me here—this is worth it.
What Makes This Version Stand Out
- Flavor: The subtle vanilla and nutmeg infusion elevates the dough from plain to memorable, giving each bite a fragrant, comforting depth.
- Texture: A perfectly airy crumb with a crisp crust is achieved through precise temperature control and a short proofing period.
- Simplicity: No fancy ingredients—just pantry staples, but arranged in a way that turns ordinary into extraordinary.
- Uniqueness: The glaze uses a touch of whole milk for a glossy finish that’s more sophisticated than standard powdered sugar.
- Crowd Reaction: Friends who’ve tried other donut recipes will say, “I’ve never tasted donuts like these.”
- Ingredient Quality: Using fresh, unbleached flour and real butter ensures maximum flavor extraction.
- Method: Step‑by‑step guidance that demystifies the yeast activation and frying process.
- Make‑Ahead Potential: Dough can be refrigerated for up to 24 hours, allowing you to have fresh donuts on demand.
Alright, let’s break down exactly what goes into this masterpiece…
Inside the Ingredient List
The Flavor Base
The foundation of any great donut is its base. All-purpose flour provides the structure, while the yeast brings that unmistakable yeasty lift. The sugar sweetens the dough without overpowering it, and a pinch of salt balances the sweetness and activates the yeast. If you skip the salt, the dough will taste flat and the yeast won’t rise properly. I recommend using a high-protein flour if you’re aiming for a chewier bite, but for this recipe, standard all-purpose flour works beautifully.
The Texture Crew
Milk and butter are the dynamic duo that gives donuts their tender crumb. Warm milk (about 110°F) wakes up the yeast and creates a smooth dough, while melted butter adds richness and a subtle sheen. The egg acts as a binder and helps the donuts rise. If you’re vegan, replace the egg with a flaxseed “egg” and use a plant-based milk for a similar outcome. The ground cinnamon and nutmeg add warmth and depth, but they’re optional; you can leave them out for a pure vanilla profile.
The Unexpected Star
The glaze is where donuts truly shine. A simple mixture of powdered sugar, milk, vanilla, and a pinch of salt creates a glossy coating that clings to each donut. The glaze’s thickness is crucial—too thick, and it clumps; too thin, and it doesn’t stick. A quick tip: whisk the glaze until it’s silky smooth, then let it sit for 10 minutes before drizzling. This allows the sugars to dissolve fully and prevents clumping.
The Final Flourish
Frying oil is the unsung hero that gives donuts their signature crunch. Use a neutral oil like canola or vegetable oil with a high smoke point. The oil temperature should be around 350°F (175°C); too hot, and the donuts will brown too quickly; too cool, and they’ll soak up oil and become greasy. A kitchen thermometer is a small investment that pays off in consistent results. Once fried, a light dusting of melted butter adds shine and a buttery finish that makes the donuts feel indulgent.
Everything's prepped? Good. Let’s get into the real action…
The Method — Step by Step
- In a large mixing bowl, combine 2 cups of all-purpose flour, 1/3 cup of granulated sugar, 2 teaspoons of active dry yeast, and 1/2 teaspoon of salt. Whisk until the dry ingredients are evenly distributed. This ensures the yeast is well dispersed, preventing clumps that could hinder rising.
- In a separate saucepan, warm 1/2 cup of whole milk to about 110°F. Add 1/4 cup of melted butter and stir until the butter is fully incorporated. Warm liquids activate yeast more effectively, creating a smoother dough.
- Pour the warm milk mixture into the dry ingredients. Add 1 large egg and 1 teaspoon of vanilla extract. Mix using a wooden spoon or a stand mixer fitted with a dough hook until a shaggy dough forms.
- Transfer the dough onto a lightly floured surface and knead for about 8–10 minutes, or until it becomes smooth and elastic. Proper kneading develops gluten, giving the donuts their characteristic chew.
- Place the dough in a lightly oiled bowl, cover with a damp cloth, and let it rise in a warm place for 1 hour, or until doubled in size. The dough should feel airy and spring back when you press it gently.
- Once risen, punch the dough down to release excess air. Roll it out on a floured surface to about 1/2-inch thickness. Use a donut cutter or two round cutters (one large, one small) to cut out donut shapes. If you don’t have a donut cutter, a small glass and a larger cup will work.
- Let the cut donuts rest for 10 minutes; this prevents them from collapsing during frying. Meanwhile, heat 2 cups of vegetable oil in a deep pot to 350°F (175°C). Use a thermometer to keep the temperature steady.
- Gently slide a few donuts into the hot oil, being careful not to overcrowd the pot. Fry for 2–3 minutes on each side, or until golden brown. Use a slotted spoon to flip them, and watch for that perfect golden color.
- Transfer the fried donuts onto a rack lined with paper towels to drain excess oil. While still warm, drizzle each donut with a thin coat of melted butter for extra shine.
- Prepare the glaze: whisk 1 cup powdered sugar, 2 tablespoons whole milk, 1 teaspoon vanilla, and a pinch of salt until smooth. Dip the warm donuts into the glaze, letting excess drip off, and place them back on the rack to set.
That’s it— you did it. But hold on, I’ve got a few more tricks that’ll take this to another level…
Insider Tricks for Flawless Results
The Temperature Rule Nobody Follows
Maintaining a consistent oil temperature is the secret to donuts that are golden on the outside and fluffy on the inside. Use a candy thermometer to check the oil, and keep it between 350°F and 360°F. If you’re using a stove top, test the oil by dropping a small piece of dough; it should sizzle immediately and rise to the surface in about 30 seconds. If it takes longer, the oil is too cool.
Why Your Nose Knows Best
Don’t ignore the aroma during proofing. A yeasty, sweet scent indicates the dough is ready. If nothing happens after 1 hour, give it a few more minutes; yeast can be temperamental. If the dough still isn’t rising, the yeast may have expired. I once tried to use old yeast and ended up with flat donuts that tasted like stale bread.
The 5-Minute Rest That Changes Everything
After cutting the donuts, let them rest for 5–10 minutes before frying. This rest period allows the gluten to relax, preventing the donuts from shrinking during cooking. If you skip this step, the donuts will contract and look uneven.
The Glaze Trick for a Glossy Finish
Whisk the glaze at a high speed for 30 seconds to incorporate air. This creates a glossy sheen that looks like melted chocolate. A thin glaze also prevents the donuts from becoming too sweet. If you prefer a thicker glaze, simply add more powdered sugar until you reach your desired consistency.
The Quick Cooling Method
Once glazed, place the donuts on a wire rack to cool. The rack allows air to circulate, preventing steam from making the glaze tacky. If you’re in a rush, place the donuts on a paper towel for the first minute to absorb excess glaze, then transfer to the rack.
Creative Twists and Variations
This recipe is a playground. Here are some of my favorite ways to switch things up:
Cinnamon Sugar Donuts
After glazing, dust the donuts with a mixture of 2 tablespoons powdered sugar and 1 teaspoon ground cinnamon. The cinnamon adds a warm, spicy note that pairs wonderfully with the sweet glaze.
Chocolate Drizzle Donuts
Melt 1 cup of dark chocolate and drizzle it over the glazed donuts. Let the chocolate set for a minute before serving. The rich chocolate contrast with the light donut creates a decadent treat.
Maple Glazed Donuts
Replace the vanilla in the glaze with 1 tablespoon pure maple syrup. The syrup gives a deeper flavor and a subtle caramel undertone that complements the dough.
Salted Caramel Donuts
Drizzle a homemade salted caramel sauce over the glazed donuts. The salty caramel pairs with the dough’s sweetness, creating a complex flavor profile that’s hard to resist.
Citrus Zest Donuts
Add the zest of one orange or lemon to the dough for a bright, fresh twist. The citrus zest infuses the donuts with a subtle brightness that lifts the overall flavor.
Vegan Donut Variation
Replace the egg with a flaxseed “egg” (1 tablespoon ground flaxseed + 3 tablespoons water) and use oat milk instead of whole milk. The result is a plant-based donut that still delivers on flavor and texture.
Storing and Bringing It Back to Life
Fridge Storage
Store donuts in an airtight container at room temperature for up to 2 days. For longer storage, place them in a zip‑lock bag and refrigerate for up to 5 days. The donuts will stay fresh and slightly firmer.
Freezer Friendly
Freeze donuts in a single layer on a parchment-lined tray for 24 hours, then transfer to a freezer bag. They can be frozen for up to 2 months. Thaw at room temperature before reheating.
Best Reheating Method
Reheat frozen donuts in a preheated 350°F oven for 10 minutes, or until warmed through. Add a tiny splash of water to the bottom of the pan before reheating; this steams the donuts back to perfection, keeping them moist and fluffy.