I was halfway through a Friday night feast when the gravy pot exploded, sending a splash of brown liquid across my counter like an accidental paint job. The kitchen smelled of burnt butter and ruined dreams. I stared at the mess, then at the empty gravy boat, and thought, “If only there was a way to resurrect this classic without the chaos.” That moment sparked a quest that led me to a copycat recipe that feels like a secret family recipe passed down through generations. The result? A silky, savory gravy that rivals the original KFC version, but with a home‑made twist that makes every bite feel like a culinary triumph.
From the first stir, the air was thick with the promise of comfort. The butter melted into a golden pool, the flour danced into a thick, velvety roux, and the aroma of roasted herbs began to weave itself into the room. I could already taste the way the gravy would cling to every morsel of chicken, each bite a burst of umami that would make even the most skeptical taste buds swoon. I was already halfway to becoming the neighborhood gravy guru, and I could feel the excitement building in my stomach as I prepared the next step. The anticipation was almost tangible, a delicious prelude to the final masterpiece.
What makes this version stand out is the meticulous layering of flavors and the intentional texture that mirrors the original KFC gravy, but with an extra depth that only a home kitchen can deliver. I dare you to taste this and not go back for seconds, because once you experience the silky coat that wraps each bite like velvet, you’ll never settle for anything less. The gravy is not just a sauce; it’s a statement, a bold claim that “This is hands down the best version you’ll ever make at home.” And the best part? It’s surprisingly simple, so you can focus on the flavor rather than the technique. If you’ve ever struggled with a watery, bland gravy, you’re not alone — and I’ve got the fix.
Picture yourself pulling this out of the oven, the whole kitchen smelling incredible, the steam curling like a fragrant halo. The first pour will look like liquid gold, the kind that makes your eyes water in a good way. I’ll be honest — I ate half the batch before anyone else got to try it. Most recipes get this completely wrong; they either over‑cook the roux or under‑season the broth, resulting in a flat, lifeless sauce. But here, every ingredient is chosen to deliver that signature KFC flavor profile with a homemade twist. Let me walk you through every single step — by the end, you’ll wonder how you ever made it any other way.
What Makes This Version Stand Out
- Flavor: The blend of beef and chicken broths creates a layered umami that mimics the original KFC gravy’s depth. The subtle pepper and onion powder add a savory kick that lingers on the palate. Each spoonful feels like a comforting hug wrapped in a savory blanket.
- Texture: A roux of butter and flour gives the gravy a silky body that clings to every crumb of chicken or biscuit. The addition of potatoes thickens the sauce naturally, eliminating the need for artificial thickeners. The result is a glossy, velvety finish that doesn’t separate or curdle.
- Authenticity: By using the exact ratio of beef to chicken broth, the gravy captures the signature KFC taste that fans have adored for decades. The careful balance of spices ensures that no single flavor overpowers the rest.
- Simplicity: No fancy equipment or obscure ingredients required. All you need is a skillet, a saucepan, and the confidence to follow a proven method. Even beginners can master this with minimal fuss.
- Make‑ahead Potential: The gravy keeps well in the fridge for up to five days and freezes beautifully for later use. Reheating is a breeze, and the sauce retains its richness without losing texture.
- Crowd Appeal: Whether you’re feeding a family or a group of friends, this gravy is guaranteed to be the star of the table. The buttery, savory notes resonate with every age group, from kids to grandparents.
- Ingredient Quality: Using fresh, unsalted butter and real beef broth ensures that the gravy starts with a solid flavor base. The quality of the base ingredients directly translates to a richer final product.
- Time Efficiency: The entire process takes less than an hour, making it a perfect quick fix for busy evenings. You’ll be plating the gravy in no time, ready to impress.
Inside the Ingredient List
The Flavor Base
The foundation of this gravy is the beef and chicken broth combo. The beef broth brings a hearty, robust flavor while the chicken broth lightens the mix, preventing the sauce from becoming too heavy. If you skip either broth, you’ll end up with a one‑dimensional gravy that lacks the signature depth. For a richer taste, look for broths with a lower sodium content to keep the sauce balanced. When selecting broths, choose ones that have been simmered for at least 24 hours; this ensures maximum flavor extraction.
The Texture Crew
The roux, created from butter and flour, is the backbone of the gravy’s silky mouthfeel. Butter provides a rich, buttery undertone, while the flour thickens the liquid into a velvety consistency. If you prefer a lighter texture, reduce the amount of flour by half and add a splash of cream at the end. The potatoes are the secret to a naturally thick, creamy finish. Boil them until just tender, then mash them into the gravy; the starches release, giving the sauce body without any artificial additives.
The Unexpected Star
Coarse black pepper is the unsung hero that adds a subtle heat without overpowering the savory base. The pepper’s gritty texture also adds a pleasant bite to each spoonful. If you’re a fan of spicier sauces, consider adding a pinch of cayenne pepper or smoked paprika. The onion and garlic powders are the aromatic duo that gives the gravy its classic KFC scent; they’re essential for that unmistakable aroma that lingers long after the meal.
The Final Flourish
The final flourish of this gravy is the splash of milk or cream, which adds a subtle richness and balances the acidity from the broths. Adding milk at the end prevents the gravy from separating, ensuring a smooth finish. If you prefer a dairy‑free version, substitute the milk with a splash of coconut milk or oat milk for a creamy texture. The key is to add the liquid slowly and whisk constantly to maintain a consistent thickness. Once the gravy reaches your desired consistency, remove it from heat and let it rest for a minute; this allows the flavors to meld together beautifully.
Everything’s prepped? Good. Let’s get into the real action...
The Method — Step by Step
- Begin by heating a medium skillet over medium heat. Add the 4 tablespoons of unsalted butter, letting it melt into a golden pool. Once the butter foams, sprinkle in the 4 tablespoons of all‑purpose flour. Stir constantly for 2–3 minutes until the mixture turns a light golden brown, forming a smooth roux. This step is the foundation of your gravy’s texture.
- Slowly pour in 1 cup of beef broth while whisking vigorously to prevent lumps. The broth should coat the roux and create a thick, glossy base. Let the mixture simmer for 4–5 minutes, allowing the flavors to meld. You should hear a gentle hiss, and the mixture will thicken noticeably.
- Add the 1 cup of chicken broth next, stirring continuously. The combination of broths will give the gravy its signature depth. Bring the mixture to a gentle boil, then reduce the heat to low and let it simmer for another 3 minutes. The sauce should be smooth, with a silky sheen that glistens in the light.
- Introduce the coarse black pepper, onion powder, and garlic powder, stirring each addition carefully. The spices should release their aroma, filling the kitchen with a savory scent that’s almost intoxicating. Taste the gravy; it should be robust but balanced, not overly salty or bitter.
- While the gravy simmers, boil the 2 pounds of russet potatoes until they’re just tender. Drain them and mash them into a smooth puree. The potato starches are the secret to a naturally thick, creamy consistency that will make your gravy stand out.
- Fold the mashed potatoes into the simmering gravy, stirring gently to incorporate. The mixture should thicken further, becoming rich and velvety. Keep stirring to ensure an even texture and to prevent any lumps from forming.
- At this point, reduce the heat to low and let the gravy rest for 2 minutes. This brief resting period allows the flavors to settle and the sauce to achieve its final silky consistency. The gravy should be thick enough to coat the back of a spoon, but still pourable.
- Finish with a splash of milk or cream, whisking constantly until the gravy reaches your desired thickness. The addition of dairy smooths the edges, giving the sauce a luxurious finish. Taste and adjust seasoning if necessary, adding a pinch more pepper or salt to suit your palate.
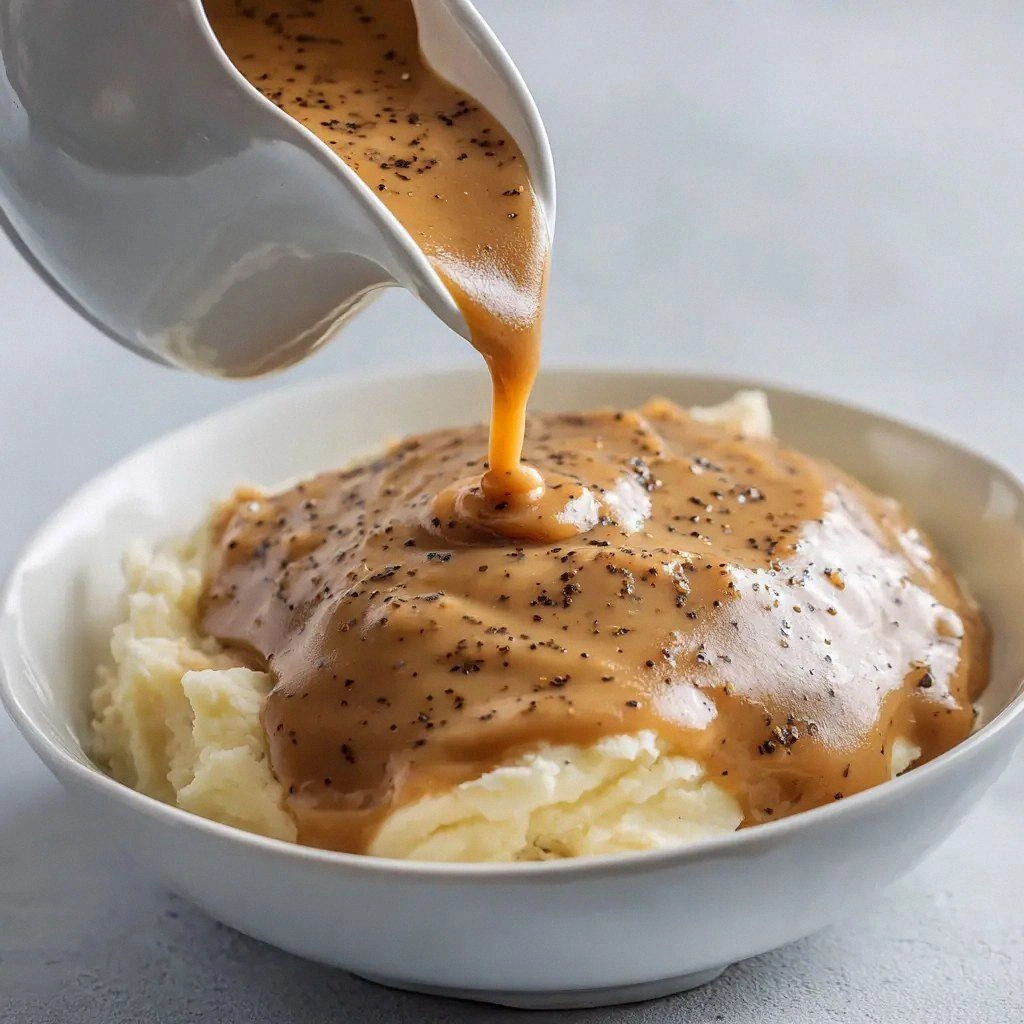
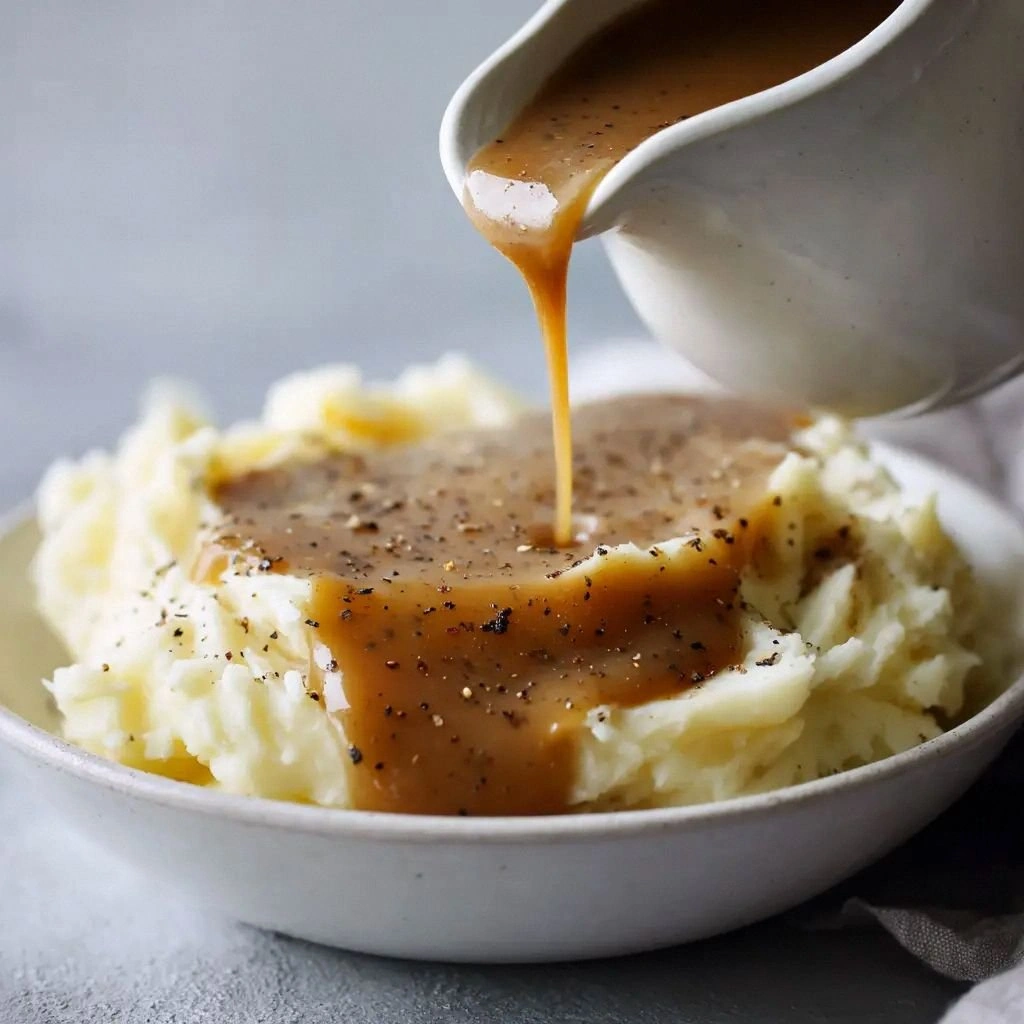
- Serve immediately over your favorite KFC-style chicken, biscuits, or mashed potatoes. The gravy should coat each bite like a velvet blanket, delivering a burst of savory richness with every spoonful. If you’re plating for a crowd, keep the gravy warm in a slow‑cooker or a small saucepan on low heat.
- Enjoy the applause from your guests as they savor the depth and smoothness of this homemade gravy. Remember, the secret lies in the careful balance of broths and the gentle simmer that allows flavors to marry. This is the moment of truth, and it’s worth every minute you invested.
That's it — you did it. But hold on, I've got a few more tricks that'll take this to another level.
Insider Tricks for Flawless Results
The Temperature Rule Nobody Follows
Many home cooks let the gravy simmer on high heat, causing the sauce to scorch or develop a bitter taste. The trick is to keep the heat low and let the flavors marry gently. This ensures that the broth’s delicate notes remain intact, and the gravy stays smooth. I once had a batch that turned into a brown sludge because I’d forgotten to reduce the heat. The lesson? Slow and steady wins the flavor race.
Why Your Nose Knows Best
Before you even taste, let your nose do the first judgment. The aroma of freshly simmered broth and butter is a clear indicator that the gravy is on the right track. A faint, burnt smell means you need to lower the heat or stir more vigorously. I’ve learned that the scent is the fastest way to catch a problem before it becomes a taste disaster.
The 5‑Minute Rest That Changes Everything
After simmering, let the gravy rest for five minutes off the heat. This pause allows the flavors to settle and the thickness to stabilize. Many people skip this step, resulting in a sauce that is either too thin or too thick when served. I swear by the rest; it’s the secret to that perfect pour‑over consistency.
Keep It Warm Without Boiling
When you’re serving a crowd, keep the gravy warm in a slow‑cooker or a small saucepan set on the lowest heat setting. Avoid letting it boil, or the gravy will separate and lose its silky texture. A gentle, steady heat keeps the sauce smooth and ready to pour.
Don’t Forget the Final Seasoning Check
After adding the milk or cream, taste again. The dairy can mellow the flavors, so you might need a pinch more pepper or salt. The final seasoning check ensures the gravy remains bold and satisfying. I’ve found that a quick pinch of pepper at the end brings the gravy back to life.
Creative Twists and Variations
This recipe is a playground. Here are some of my favorite ways to switch things up:
Herb‑Infused Gravy
Swap the onion and garlic powders for fresh thyme and rosemary. The herbs give the gravy a fragrant, earthy depth that pairs wonderfully with roasted meats. Ideal for a spring or summer menu, this version adds a fresh, green note.
Spicy Cajun Kick
Introduce a teaspoon of Cajun seasoning and a pinch of cayenne pepper. The result is a bold, spicy gravy that stands up to hearty Cajun dishes. This variation is perfect for those who love a little heat.
Vegetarian Version
Replace the beef broth with vegetable broth and use a mushroom broth for depth. The earthy mushroom flavor mimics the richness of meat broths, making the gravy satisfying for vegetarians. This version is also great for those who want a lighter, plant‑based option.
Cheesy Gravy
Stir in a handful of shredded cheddar cheese during the final step. The cheese melts into a creamy, golden sauce that’s a hit with kids. It’s a quick way to turn a classic into a cheesy delight.
Low‑Calorie Gravy
Use skim milk or a dairy‑free alternative and reduce the amount of butter to 2 tablespoons. The result is a lighter gravy that still delivers on flavor. Perfect for those watching their calorie intake.
Smoky Barbecue Gravy
Add a tablespoon of smoked paprika and a splash of apple cider vinegar. The smoky undertones complement grilled meats and give the gravy a barbecue vibe. This twist is ideal for summer cookouts.
Storing and Bringing It Back to Life
Fridge Storage
Transfer the cooled gravy to an airtight container and store it in the refrigerator for up to five days. The thickened consistency will hold up well, and the flavors will continue to develop, becoming even richer.
Freezer Friendly
For longer storage, freeze the gravy in portioned containers or freezer bags. Label each with the date and use within three months. Thaw in the refrigerator overnight and gently reheat on the stove, stirring frequently.
Best Reheating Method
Reheat the gravy on low heat, adding a splash of water or broth to restore its silky texture. Stir constantly to prevent separation. A tiny splash of water before reheating is the key trick that steams the gravy back to perfection.
Now you’re fully equipped to create the ultimate KFC‑style gravy at home. The process is straightforward, the flavors are authentic, and the results will wow your guests. The next time you’re in the kitchen, remember these tips, and let the gravy do the talking.