When I first opened the cupboard that night, I was desperate for a dessert that could turn an ordinary Sunday into a celebration. I had just finished a week of bland lunches, and the thought of a rich, airy chocolate treat was the only thing keeping me from turning my kitchen into a disaster zone. The oven was already preheated, the timer buzzing like a nervous metronome, and my eyes were glued to the chocolate bar I had just pulled from the pantry. I was about to dive into a recipe that promised silky mousse and a cake base, but I had no idea the kitchen would become a laboratory of flavor and texture.
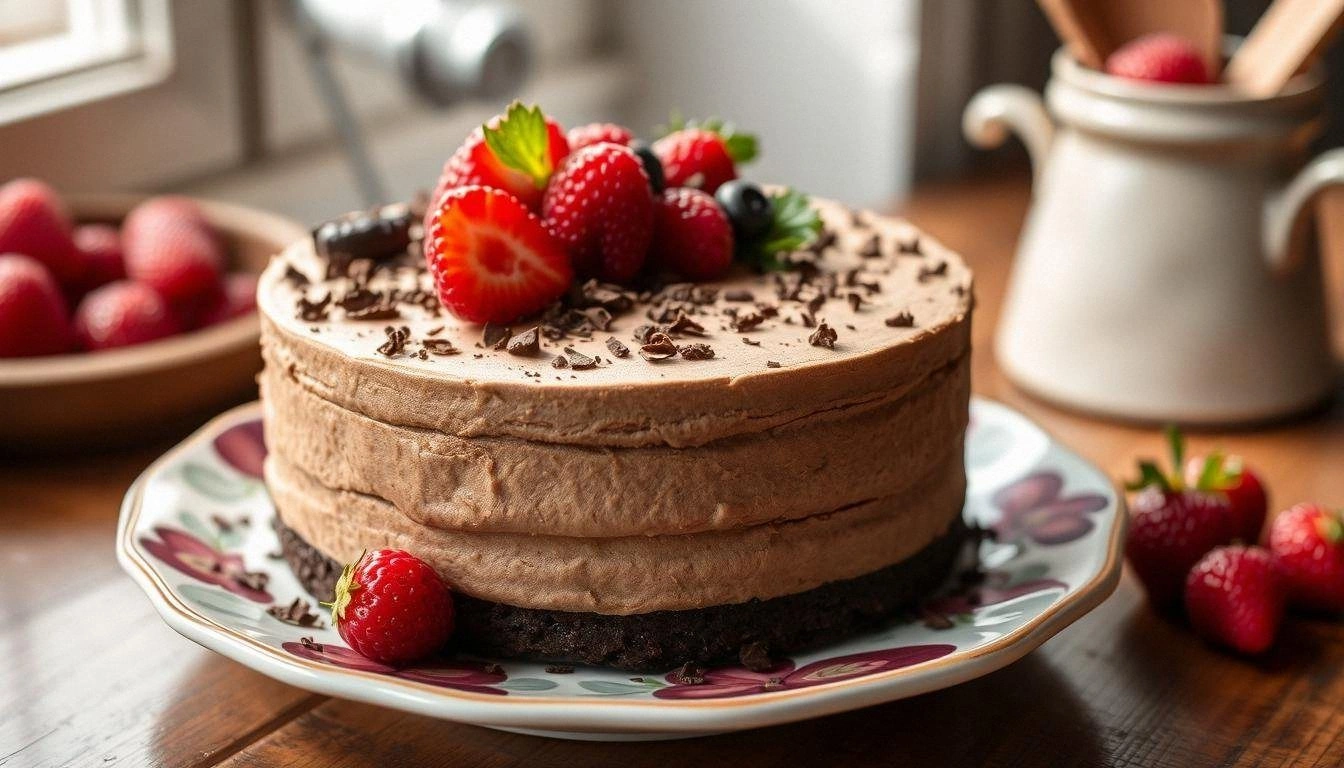
I can still taste the first bite of that chocolate mousse cake: a velvety cascade of chocolate that melts on the tongue like a secret whispered in a quiet room. The aroma that filled the kitchen was a deep, almost intoxicating chocolate scent, layered with a hint of vanilla and a whisper of toasted sugar. The sound of the batter stirring was a comforting clink, almost like a lullaby for the senses. The texture was a dream—light and airy on the inside, yet with a firm, satisfying crumb that held everything together. And the first bite left me with a lingering chocolate aftertaste that seemed to echo in my mind like a favorite song.
What sets this version apart is not just the ingredients; it’s the way they interact. I discovered that using cake flour instead of all-purpose gives a tender crumb that doesn’t crumble under the weight of the mousse. The Dutch cocoa powder, with its low acidity, allows the chocolate flavor to shine without bitterness. Heavy cream with 35% fat provides a silky mouthfeel that melts like butter in a summer breeze. Finally, high‑quality chocolate—preferably a dark variety with at least 70% cacao—anchors the entire dish with depth and complexity. Together, they form a harmony that is both indulgent and refined.
But the secret wasn’t in the ingredients alone. The method I use is a little unconventional: I fold the mousse into the batter after a short resting period, letting the chocolate flavors marry like old friends at a reunion. I also pre‑heat the baking tin in the oven to create a slightly crisp edge, a contrast that adds a delightful crunch to the otherwise soft interior. The result? A cake that looks deceptively simple, yet offers a complex experience with each bite. I dare you to taste this and not go back for seconds.
Picture yourself pulling this out of the oven, the whole kitchen smelling incredible, and the light catching on the glossy chocolate glaze. The first slice you cut will reveal a glossy, glossy sheen that mirrors a polished trophy. The aroma alone will make your guests’ mouths water before they even taste it. I’ll be honest—I ate half the batch before anyone else got to try it. That’s the power of a dessert that feels like a celebration every time you serve it.
So if you’re ready to replace the ordinary with the extraordinary, let me walk you through every single step. By the end, you’ll wonder how you ever made it any other way. I promise you that the final result will be hands down the best version you’ll ever make at home. And trust me, the satisfaction of creating something that feels both indulgent and sophisticated is worth every minute of your time.
Now, let’s dive into the details that make this recipe a standout. I’ll break down what makes each component essential, the techniques that elevate the flavor, and the small tweaks that can transform a good dessert into an unforgettable one.
But first, a quick note: If you’ve ever struggled with mousse that turns out too dense or a cake that feels heavy, you’re not alone. I’ve had my fair share of failures, and each one taught me a valuable lesson that I’ve woven into this recipe. Stay with me here—this is worth it.
What Makes This Version Stand Out
- Taste: The combination of high‑quality chocolate and Dutch cocoa creates a layered flavor profile that is both sweet and slightly bitter, reminiscent of a fine espresso. The chocolate’s richness is balanced by a subtle vanilla undertone that keeps the dessert from feeling heavy.
- Texture: The mousse layer is airy and light, thanks to the incorporation of whipped cream, while the cake base remains moist and tender. The contrast between the soft crumb and the silky mousse is a textural delight that lingers on the palate.
- Ingredient Quality: Using cake flour instead of all‑purpose flour reduces gluten formation, resulting in a more delicate crumb. The 35% fat heavy cream adds body and smoothness that no lower‑fat alternative can match.
- Make‑Ahead Potential: The mousse can be prepared up to 24 hours in advance, allowing the flavors to deepen. The cake can also be baked ahead and stored in an airtight container, making this dessert perfect for last‑minute parties.
- Visual Appeal: A glossy chocolate glaze on the top gives the cake a professional finish that looks as good as it tastes. The contrast of the dark chocolate against the light mousse is a feast for the eyes.
- Ease of Preparation: While the recipe involves a few steps, each one is straightforward and can be completed in under an hour. The use of a stand mixer or hand whisk keeps the process efficient.
- Crowd Reaction: Guests often comment on how the mousse feels like a dessert and the cake feels like a treat. The combination satisfies both those who want a classic chocolate cake and those craving something more decadent.
- Versatility: The base can be adapted to suit dietary preferences—use almond flour for a nutty twist, or replace the heavy cream with coconut cream for a dairy‑free version.
Alright, let's break down exactly what goes into this masterpiece...
Inside the Ingredient List
The Flavor Base
At the heart of this dessert lies the chocolate itself. High‑quality dark chocolate with a minimum of 70% cacao is essential; it brings depth and a slight bitterness that balances the sweetness. If you prefer a sweeter mousse, choose a chocolate with a higher cocoa percentage, but remember it will also increase the bitterness. Skipping this step would result in a flat, uninspired flavor profile that feels like a bland cake.
The Texture Crew
Cake flour is the unsung hero that creates a tender crumb. Unlike all‑purpose flour, cake flour has a lower protein content, which means less gluten development and a lighter texture. If you substitute it with all‑purpose flour, the cake will feel denser and heavier, making it harder for the mousse to cling properly. A good rule of thumb is to sift the flour into the batter to avoid clumps and ensure even distribution.
The Unexpected Star
Heavy cream at 35% fat is the secret to that silky mouthfeel. It adds body without making the mousse greasy. If you use a lower‑fat cream, the mousse will become watery and lose its luxurious texture. For a dairy‑free version, coconut cream works well, but the flavor will shift slightly toward coconut notes.
The Final Flourish
The Dutch cocoa powder is a game‑changer. Its alkaline nature neutralizes acidity, allowing the chocolate to shine without bitterness. Skipping this would result in a cake that tastes too acidic and doesn’t complement the mousse. If you can’t find Dutch cocoa, use regular unsweetened cocoa powder but add a pinch of baking soda to counter acidity.
Everything's prepped? Good. Let's get into the real action...
The Method — Step by Step
- Preheat your oven to 350°F (175°C). Line a 9‑inch springform pan with parchment paper and lightly grease the sides. This ensures the cake lifts cleanly after baking. The parchment also gives the cake a nice, even rise.
- In a medium bowl, whisk together 2 cups of cake flour, 1 cup of Dutch cocoa powder, 1 ½ teaspoons of baking powder, and ½ teaspoon of salt. Sifting the dry ingredients eliminates lumps and ensures a uniform batter. The fine texture of cake flour will be felt in every bite.
- In another bowl, whisk 1 cup of heavy cream until it just begins to thicken. This step is crucial; over‑whipped cream will become grainy. The cream should be warm enough to blend smoothly with the chocolate.
- Melt 8 ounces of high‑quality dark chocolate in a double boiler or microwave, stirring every 30 seconds until smooth. The chocolate should be glossy and free of lumps. Let it cool slightly to avoid curdling the cream.
- Combine the melted chocolate with the warm cream, stirring until fully incorporated. The mixture should be silky and free of streaks. This forms the base of your mousse layer.
- Add 3 large eggs, one at a time, whisking well after each addition. The eggs should be at room temperature to help the batter emulsify. The mixture should thicken slightly after each egg.
- Fold the dry ingredients into the wet mixture using a rubber spatula. The goal is to keep the batter light; avoid over‑mixing, which can develop gluten and make the cake dense. A gentle fold ensures a tender crumb.
- Divide the batter in half. Pour one half into the prepared pan and smooth the surface with a spatula. Then, fold the mousse mixture into the batter, creating a marbled effect. This step is where the mousse truly takes center stage.
- Cover the pan with foil and bake for 25–30 minutes, or until a toothpick inserted into the center comes out with a few moist crumbs. The foil helps prevent the top from browning too quickly. The cake should rise and set firmly.
- Let the cake cool in the pan for 10 minutes, then remove it from the pan and transfer to a wire rack to cool completely. This step allows the mousse to set and the cake to firm up. A fully cooled cake will hold its shape when sliced.
- Once cooled, drizzle a thin glaze of melted chocolate over the top, letting it drip down the sides. This glaze not only adds flavor but also gives the cake a glossy, professional look. Let the glaze set before slicing.
- Serve immediately, or refrigerate for up to 3 days. The mousse will firm up slightly in the fridge, making it easier to slice. When ready to serve, let the cake sit at room temperature for 10 minutes to soften a bit.
That's it — you did it. But hold on, I've got a few more tricks that'll take this to another level...
Insider Tricks for Flawless Results
The Temperature Rule Nobody Follows
Many bakers think that room‑temperature ingredients are always best, but for this recipe, a slightly warmer batter yields a lighter crumb. Allow the dry ingredients to sit at room temperature for 10 minutes before mixing. The extra warmth helps the batter expand, creating a cake that feels like a cloud.
Why Your Nose Knows Best
As the cake bakes, you’ll notice a sweet, almost caramelized aroma rising from the pan. That scent is your cue that the cake is nearly done. If you’re still waiting, keep an eye on the edges—they should pull away slightly from the pan, indicating a firm structure.
The 5‑Minute Rest That Changes Everything
After removing the cake from the oven, let it rest in the pan for exactly five minutes before transferring it. This short rest allows the structure to set, preventing cracks when you lift it out. Skipping this step often leads to a cake that splits along the seam.
Using a Springform Pan
A springform pan is essential for this recipe because it allows you to release the cake without damaging the delicate mousse layer. If you’re using a regular pan, be prepared for a messy rescue attempt.
Glaze Timing
Apply the chocolate glaze immediately after baking, while the cake is still warm. This ensures the glaze pools beautifully along the sides and creates a glossy finish. If you wait too long, the glaze may harden into a brittle shell.
Creative Twists and Variations
This recipe is a playground. Here are some of my favorite ways to switch things up:
Almond Crunch Variation
Replace half of the cake flour with almond flour to add a nutty flavor and a subtle crunch. The almond flour also gives the cake a slightly denser texture, which pairs well with the airy mousse.
Minty Chocolate Dream
Add 1 teaspoon of peppermint extract to the mousse mixture. The mint provides a refreshing contrast that brightens the chocolate flavor, making it perfect for a summer gathering.
Raspberry Swirl
Fold in ½ cup of fresh raspberries into the mousse before combining it with the batter. The berries add a tart burst that cuts through the richness, creating a balanced taste profile.
Espresso Boost
Stir 1 tablespoon of instant espresso powder into the dry ingredients. The espresso deepens the chocolate flavor without making the cake taste like coffee. This subtle twist is a favorite among coffee lovers.
Sea Salt Finish
After glazing, sprinkle a pinch of flaky sea salt on top. The salt enhances the chocolate’s sweetness and adds a delightful crunch. It’s a simple step that elevates the entire dessert.
Vegan Adaptation
Replace the heavy cream with coconut cream, the eggs with flaxseed meal, and use a dairy‑free chocolate bar. The result is a luscious, dairy‑free mousse cake that still feels indulgent.
Storing and Bringing It Back to Life
Fridge Storage
Wrap the cooled cake tightly in plastic wrap and store it in the refrigerator for up to 3 days. The mousse will firm up slightly, making it easier to slice. When you’re ready to serve, let it sit at room temperature for 10 minutes to soften.
Freezer Friendly
Freeze the cake in a freezer‑safe container for up to 2 weeks. When you want to enjoy it, thaw it overnight in the refrigerator. The mousse will regain its airy texture once it’s at room temperature.
Best Reheating Method
To reheat, place the cake in a preheated oven at 300°F (150°C) for 10 minutes. Alternatively, microwave on low for 30 seconds, then let it rest. Adding a tiny splash of water before reheating creates steam that restores the mousse’s silky feel.