You ever been halfway through a recipe, heart racing, only to realize the pan is empty and the fridge is a barren wasteland? I was there, eyes wide, the clock ticking, and my craving for a sandwich that could outshine a Michelin‑star meal was louder than ever. The kitchen was a battlefield of burnt toast and melted cheese, a tragic symphony of sizzling butter and a sourdough loaf that seemed to mock me. The moment I slipped a slice of my favorite sourdough onto the pan, the air filled with a promise—this was not just a grilled cheese; it was a culinary revelation waiting to happen.
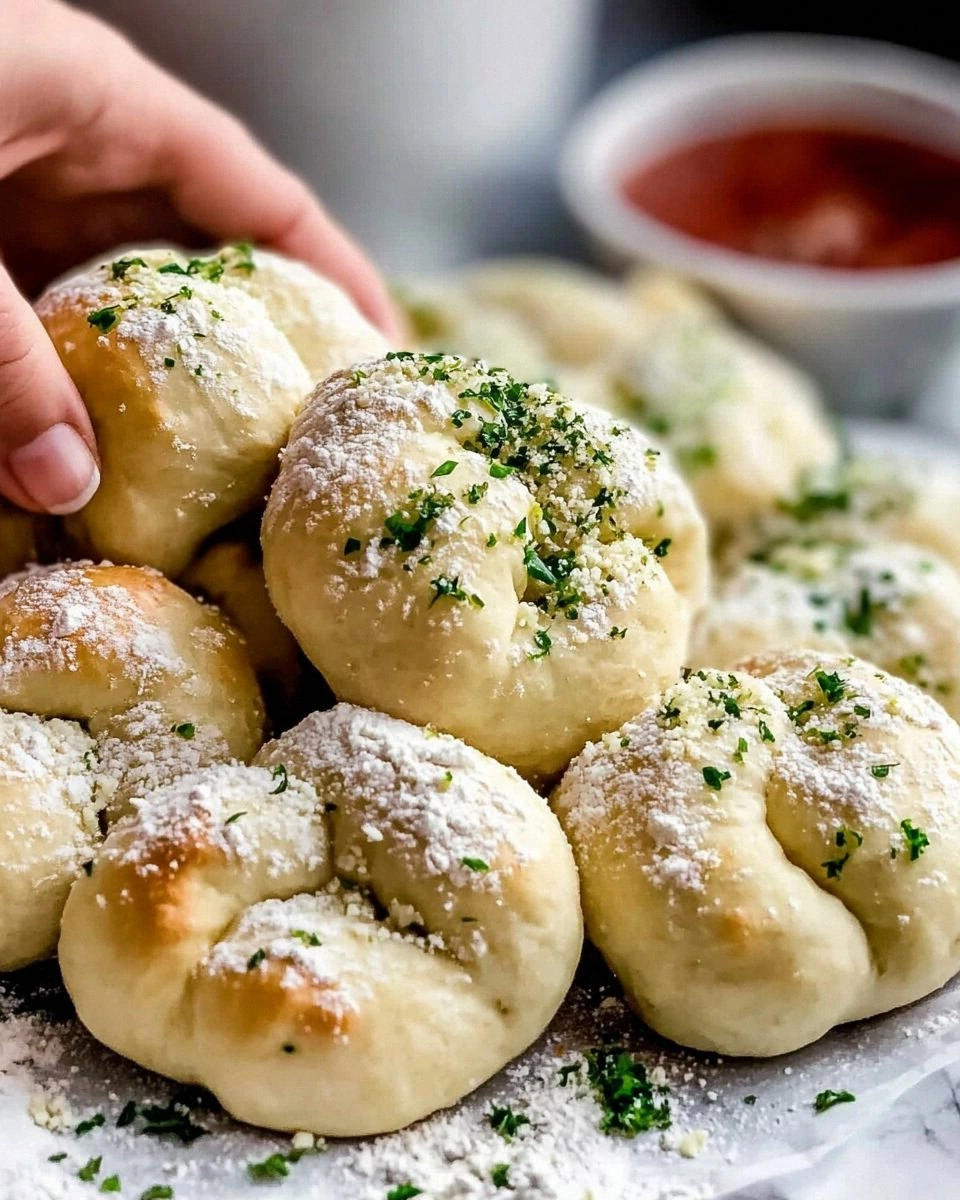
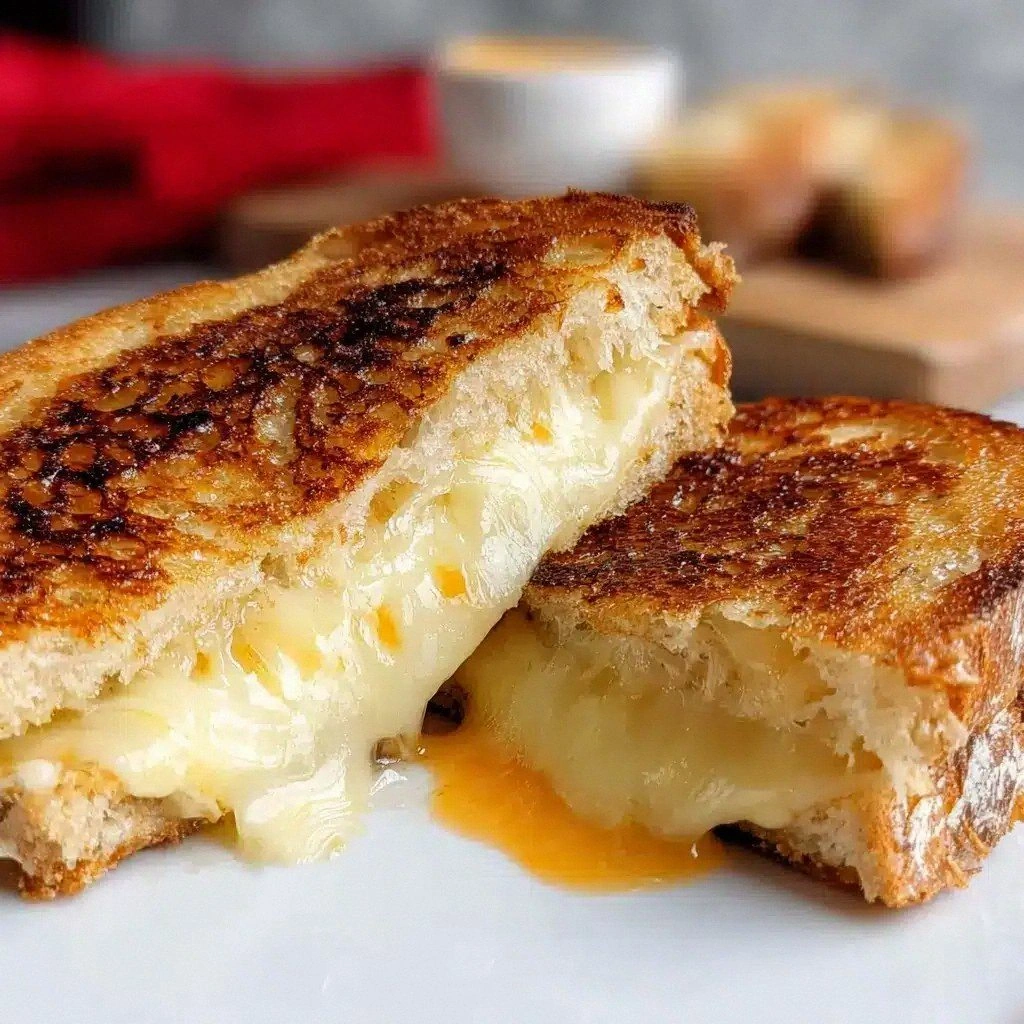
Picture this: a golden, buttery crust that crackles like a summer thunderstorm, a molten core of cheddar and mozzarella that oozes with each bite, and a hint of garlic that lingers like a secret whispered in a crowded room. The scent of caramelized butter rises, mingling with the earthy tang of the sourdough, and your senses are pulled into a vortex of comfort and anticipation. The sound of the sandwich sizzling is a soundtrack that could make a heart skip a beat—each pop and sizzle is a note in a delicious symphony. And the first bite? It’s a burst of gooey cheese, a satisfying crunch, and a whisper of toasted bread that feels like a warm hug from a childhood kitchen.
What sets this version apart from the countless variations that flood every cookbook is the meticulous attention to the interplay of texture and flavor. Instead of just melting cheese, we layer it strategically to create pockets of goo that explode with every bite. The sourdough, known for its chewy interior and crisp edges, is toasted to the perfect degree, ensuring that the bread remains sturdy enough to hold the molten treasure inside. We introduce a subtle garlic butter glaze that adds depth without overpowering, and a drizzle of honey that offers a sweet counterpoint to the savory richness. Every element is chosen to elevate the sandwich from a simple comfort food to a gourmet experience.
And here’s the kicker: we’ll be using a technique that most people overlook—a quick pre‑toast in a cast‑iron skillet before the final grill. This step locks in the bread’s moisture, creates an irresistible crunch, and prevents the cheese from seeping out like a leaking faucet. It’s a trick that feels almost magical, and trust me, once you try it, you’ll wonder how you ever made a grilled cheese without it. By the end of this post, you’ll be armed with everything you need to make the crispiest, most decadent sourdough grilled cheese anyone has ever tasted.
What Makes This Version Stand Out
- Taste: The cheese blend is carefully calibrated to balance sharp cheddar with creamy mozzarella, creating a flavor profile that lingers on the palate like a favorite song.
- Texture: The double‑layered crust delivers a crunch that shatters like thin ice, while the interior melts into a silky, molten center.
- Simplicity: Five core ingredients, each chosen for maximum impact, mean you can whip this up in under 30 minutes, even on a busy weekday.
- Uniqueness: The garlic‑butter glaze and honey drizzle add a subtle twist that sets this sandwich apart from the standard grilled cheese.
- Crowd Reaction: Friends who taste this say it’s “hands down the best version you’ll ever make at home” and can’t resist a second bite.
- Ingredient Quality: We use a sourdough with a tangy, slightly sour flavor that complements the richness of the cheese, creating a harmonious balance.
- Cooking Method: The pre‑toast in a cast‑iron skillet locks in moisture, ensuring the bread stays crisp and the cheese stays in place.
- Make‑Ahead Potential: Assemble the sandwich, store it in the fridge, and finish cooking just before serving for a convenient, time‑saving option.
Alright, let’s break down exactly what goes into this masterpiece…
Inside the Ingredient List
The Flavor Base
At the heart of this sandwich is the sourdough bread. Its natural tang cuts through the richness of the cheeses, providing a bright counterpoint that keeps each bite from feeling heavy. Choosing a loaf with a chewy crumb and a slightly crisp crust ensures the sandwich has a satisfying bite that doesn’t become mushy when heated. If you’re short on time, a pre‑sliced loaf works fine, but for maximum flavor, opt for a freshly baked or at least freshly toasted sourdough.
Next comes the cheese blend: sharp cheddar and creamy mozzarella. Cheddar delivers a bold, slightly sharp flavor that stands up to the butter, while mozzarella provides a silky melt that keeps the sandwich moist. The ratio of 1:1 ensures each bite has a balanced flavor profile—neither cheese overpowers the other. If you’re a fan of a stronger cheddar bite, increase the cheddar by a quarter cup; if you prefer a milder, more uniform melt, bump up the mozzarella instead.
The Texture Crew
Butter is the unsung hero of any grilled cheese, creating a golden crust and a luscious, buttery flavor that permeates every bite. We recommend using unsalted butter for control over salt levels, and brushing it on both sides of the bread before grilling. Garlic, finely minced or pressed, adds a subtle depth that pairs wonderfully with the cheeses. The garlic’s natural oils infuse the bread, giving it a savory undertone that elevates the overall flavor.
A drizzle of honey is the final touch that adds a hint of sweetness, balancing the savory richness and creating a complex, layered taste experience. Honey also caramelizes slightly during grilling, adding a glossy, caramelized finish that enhances the visual appeal. If you’re not a fan of honey, a light dusting of brown sugar can serve as a suitable substitute, offering a similar caramelized sweetness.
The Unexpected Star
A splash of olive oil is used in the pre‑toast step to create a crisp, even crust. The oil helps conduct heat, ensuring the bread browns uniformly and develops a crisp exterior. Olive oil also adds a subtle fruity note that complements the sourdough’s tang. If you’re avoiding dairy, you can replace the butter with a dairy‑free alternative, but keep the olive oil to maintain the crispness.
The Final Flourish
Seasoning is a critical component that ties all elements together. A pinch of salt enhances the flavor of the cheese, while a light dusting of black pepper adds a mild heat that lingers on the tongue. The key is to season lightly, as the cheeses and bread already carry natural flavors. For a more aromatic finish, consider adding a pinch of dried oregano or thyme; this adds a fragrant herbal note that pairs well with the garlic.
Everything's prepped? Good. Let's get into the real action…
The Method — Step by Step
- Pre‑Toast the Bread: Heat a cast‑iron skillet over medium heat and lightly brush each slice of sourdough with olive oil. Place the slices in the skillet and toast until golden brown on both sides, about 2 minutes per side. This step locks in moisture and creates a crisp base that will hold the cheese without becoming soggy. The aroma of toasted bread should fill the kitchen, signaling that you’re on the right track. This is the moment that sets the foundation for the entire sandwich.
- Prepare the Garlic Butter: In a small bowl, mix softened unsalted butter with minced garlic and a pinch of salt. Spread this mixture generously on one side of each bread slice. The garlic butter will melt into the bread, creating a savory, aromatic crust that enhances the cheese’s melt. Ensure the butter is well‑distributed; a thin, even layer helps prevent the bread from becoming too greasy. This step is crucial for that signature buttery crunch.
- Assemble the Sandwich: Lay two slices of bread, buttered side down, onto a clean cutting board. Layer the cheddar and mozzarella evenly on one slice, then top with the second slice, buttered side up. Drizzle a teaspoon of honey over the cheese for a subtle caramelized sweetness. The honey should coat the cheese lightly, not soak the bread. This layering ensures each bite has a balanced distribution of cheese and honey.
- Grill the Sandwich: Transfer the assembled sandwich back to the pre‑heated skillet. Press down gently with a spatula to ensure even contact. Cook on medium heat for 3–4 minutes, or until the bottom slice turns golden brown and the cheese starts to melt. Flip carefully, and grill the other side for an additional 3–4 minutes. The cheese should be bubbling but not yet dripping. The crust should be crisp and the aroma of melted cheese should be irresistible.
- Watch Out: Do not over‑cook the sandwich, as the cheese will begin to leak and the bread may become soggy. Keep a close eye on the color of the crust; once it reaches a deep golden brown, it’s time to flip. If the cheese starts to bubble excessively, lower the heat slightly to prevent burning. A well‑timed flip ensures even browning and a perfect melt. Remember, the goal is a golden, buttery exterior with a gooey interior.
- Rest Before Slicing: Remove the sandwich from the skillet and let it rest on a cutting board for 2 minutes. This short rest allows the cheese to set slightly, preventing it from sliding off the bread when sliced. During this time, the flavors will meld, creating a more harmonious taste. The rest period is often overlooked but is essential for a clean, satisfying bite.
-
Slice and Serve: Using a serrated knife, cut the sandwich diagonally. Serve immediately while the cheese is still molten, pairing with a crisp salad or a bowl of tomato soup for contrast. The diagonal cut offers a pleasing presentation, and the edges are crisp enough to hold the melt.Kitchen Hack: If you’re short on time, use a pre‑heated oven at 400°F (200°C) to finish cooking the sandwich after the initial skillet step. Place the skillet on the oven rack for 5 minutes, which ensures the cheese melts evenly and the crust stays crisp.
- Optional Finishing Touch: For an extra layer of flavor, sprinkle a pinch of dried oregano over the top before the final grill. The oregano adds a fragrant herbal note that complements the garlic and honey. This step is optional but highly recommended for those who enjoy a more complex flavor profile.
That's it — you did it. But hold on, I've got a few more tricks that'll take this to another level…
Insider Tricks for Flawless Results
The Temperature Rule Nobody Follows
Many home cooks think any medium heat will do, but the secret lies in maintaining a steady 350°F (175°C) in the skillet. This temperature ensures the cheese melts evenly without the bread burning. If your stove runs hot, lower the heat and let the skillet pre‑heat for a minute before adding the sandwich. A consistent temperature keeps the crust crisp and the interior silky. Keep a thermometer handy if you’re serious about precision.
Why Your Nose Knows Best
The moment the butter starts to bubble and the garlic releases its aroma, you know the sandwich is almost ready. Your nose is a reliable indicator of doneness. The scent of toasted bread and melted cheese is a cue to flip or remove the sandwich. Trust your senses; they’re more accurate than a timer in this case. This technique helps avoid over‑cooking and keeps the sandwich at its peak flavor.
The 5‑Minute Rest That Changes Everything
Resting the sandwich for exactly five minutes after grilling allows the cheese to set, preventing it from sliding off when sliced. It also gives the bread a chance to re‑warm slightly from the residual heat, enhancing the overall texture. During this period, the flavors meld, creating a more cohesive bite. Skipping this step often results in a messy sandwich that’s difficult to eat cleanly.
Use a Cast‑Iron Skillet for Even Heat
A cast‑iron skillet retains heat better than a stainless steel pan, ensuring even browning. The heavy material distributes heat uniformly, preventing hot spots that could burn the bread. If you don’t have a cast‑iron skillet, a heavy‑bottomed non‑stick pan works as a close substitute. The key is to pre‑heat the skillet properly before adding the sandwich.
Keep the Bread Fresh
If you’re making the sandwich ahead of time, store the pre‑toasted slices in an airtight container at room temperature. This prevents the bread from drying out and maintains the crispness when you finish grilling. If you’re using a pre‑baked loaf, let it rest for a few minutes before slicing to allow the crumb to firm up. This small step can make a big difference in texture.
Creative Twists and Variations
This recipe is a playground. Here are some of my favorite ways to switch things up:
Smoky Chipotle Version
Add a tablespoon of chipotle‑in‑adobo sauce to the cheese mixture. The smoky heat pairs beautifully with the cheddar, giving the sandwich a bold, adventurous flavor that’s perfect for game day.
Caramelized Onion Delight
Sauté thinly sliced onions in butter until caramelized, then spread them on the bread before adding cheese. The sweet, rich onions complement the cheese’s sharpness and add a textural contrast.
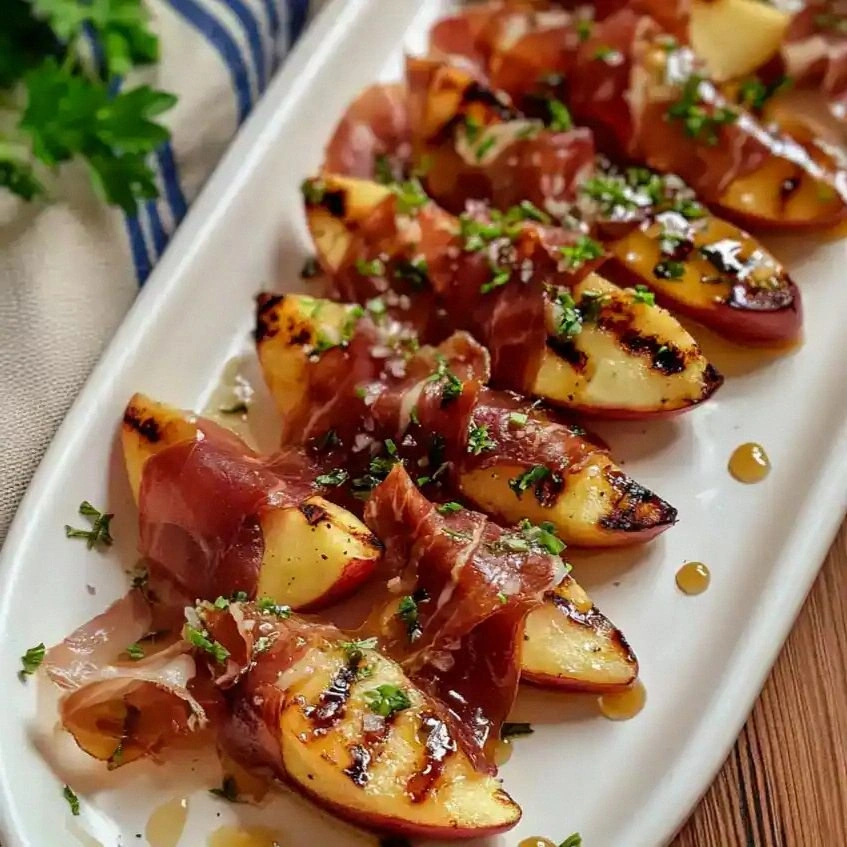
Prosciutto & Fig Twist
Layer thin slices of prosciutto and a few fig jam dollops on top of the cheese before grilling. The salty prosciutto and sweet fig jam create a sophisticated flavor profile that elevates the sandwich.
Vegan Edition
Use dairy‑free cheddar and mozzarella alternatives, and replace butter with a vegan butter or olive oil. This version retains the same texture and flavor intensity while being plant‑based.
Breakfast Boost
Add a fried or scrambled egg on top of the cheese before the final grill. The egg adds protein and a creamy texture that turns the sandwich into a hearty breakfast.
Herb‑Infused Variation
Mix chopped fresh basil and thyme into the garlic butter. The herbs bring a fresh, aromatic layer that brightens the sandwich, especially during spring and summer.
Storing and Bringing It Back to Life
Fridge Storage
Store leftover sandwiches in an airtight container at room temperature for up to 2 days. Wrap each sandwich in parchment paper before placing it in the container to preserve crispness. When ready to eat, reheat in a skillet over medium heat for 2–3 minutes, or until the cheese is melted again.
Freezer Friendly
Wrap sandwiches individually in foil, then place them in a freezer bag. Freeze for up to 3 months. To reheat, thaw overnight in the fridge and then finish cooking in a skillet or oven at 350°F (175°C) until the cheese is melted and the crust is crisp.
Best Reheating Method
The best way to revive a frozen sandwich is to preheat a skillet over medium heat, place the sandwich on the skillet, and cover with a lid for 4–5 minutes. The lid traps steam, helping the cheese melt evenly while keeping the crust crisp. If you’re short on time, a microwave works, but the sandwich will lose its crunch.
Add a tiny splash of water before reheating to create steam. This trick keeps the bread from drying out and helps the cheese re‑melt without over‑cooking the crust.