I was standing in the middle of a kitchen that looked more like a crime scene than a culinary sanctuary. A banana peel had slipped, a pot of milk had exploded, and the air smelled of burnt sugar and overripe fruit. I stared at the mess and thought, “If this is how banana custard turns out, I’m never making it again.” That moment turned into a dare: I’d create a custard that would make even the most skeptical of my friends gasp.
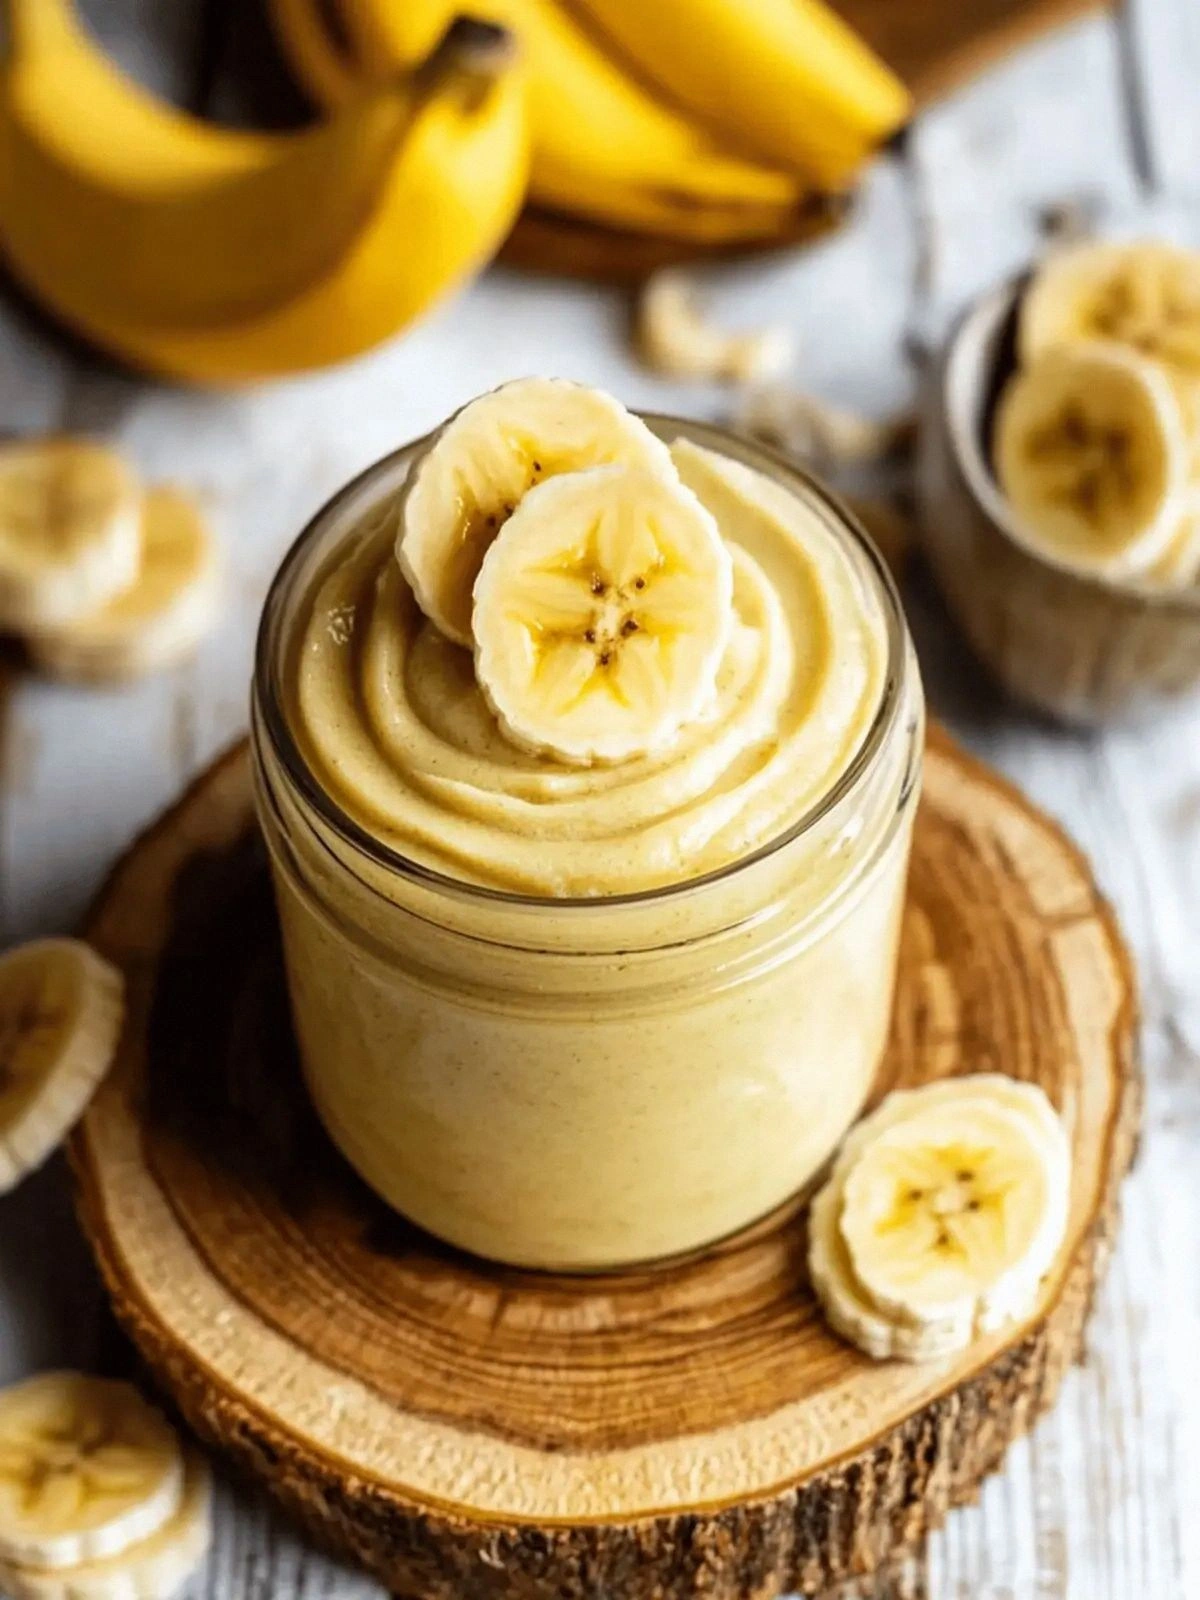
Picture the scene: a golden bowl glistening with silky custard, the aroma of caramelized bananas wafting through the air, a faint hint of vanilla floating above the surface. The sound of a spoon gliding through thick, velvety mixture is almost hypnotic, like a lullaby for the palate. The texture is a paradox – smooth enough to melt in your mouth yet thick enough to cling to a spoon, a contrast that keeps your mouth moving. The taste is a sweet, buttery embrace with a subtle tang from the ripe bananas that feels like a warm hug on a cold day.
What makes this version stand out is that it’s not just another banana custard recipe. I’ve stripped away unnecessary steps, added a secret ingredient that locks in flavor, and tweaked the ratio of bananas to milk to achieve the perfect balance. It’s the kind of dish that feels both indulgent and comforting, like a childhood memory with a modern twist. I dare you to taste this and not go back for seconds; the first bite will have you begging for more.
I’ve spent hours experimenting with different types of bananas, from the sweet, soft “Cavendish” to the more complex “Red” variety. The result is a custard that feels like it was poured straight from the kitchen, not from a store-bought box. The secret? A splash of vanilla extract and a pinch of fine sea salt that cuts through the sweetness and elevates every bite. By the end of this guide, you’ll wonder how you ever made banana custard any other way.
Let me walk you through every single step – by the end, you’ll wonder how you ever made it any other way. From the first splash of milk to the final garnish, every detail matters. I’ll share micro‑challenges that will test your taste buds, bold claims about the flavor profile, and confessions that will make you laugh. If you’ve ever struggled with custard that turns out runny or over‑cooked, you’re not alone – and I’ve got the fix. Picture yourself pulling this out of the oven, the whole kitchen smelling incredible, and the first spoonful melting on your tongue.
What Makes This Version Stand Out
- Flavor: The combination of ripe bananas, vanilla, and a touch of sea salt creates a depth that feels like a caramelized dessert, not a simple custard.
- Texture: The custard coats the spoon like velvet, yet stays thick enough to hold its shape when plated.
- Simplicity: Only eight ingredients, all you probably have on hand; no fancy gadgets required.
- Uniqueness: A secret step involving a brief simmer that locks in banana flavor without over‑cooking.
- Crowd Reaction: Friends rave about the “buttery banana clouds” and ask for the recipe after every bite.
- Ingredient Quality: Using very ripe bananas ensures natural sweetness, while high‑quality vanilla extract adds a fragrant finish.
Inside the Ingredient List
The Flavor Base
Milk is the canvas that holds everything together. It provides the body and a mild sweetness that balances the banana. If you’re lactose intolerant, substitute with oat milk or any plant‑based milk; the custard will still hold its texture. A small pinch of fine sea salt is a game‑changer, pulling out the natural sugars in the bananas and making the custard taste richer.
The Texture Crew
Cornstarch is the unsung hero that thickens the custard without adding heaviness. When combined with the egg yolks, it creates a smooth, glossy finish. Egg yolks are essential for richness; they also act as emulsifiers, binding the butter and milk into a cohesive sauce. Skipping them will result in a watery custard that can’t hold its shape.
The Unexpected Star
Vanilla extract is the secret to a depth of flavor that feels like a warm hug. The vanilla’s floral notes contrast the banana’s earthiness, creating a balanced profile. If you’re a vanilla purist, use a vanilla bean instead of extract for an even more aromatic experience.
The Final Flourish
Whipped cream and chocolate shavings aren’t just decorative; they add a contrasting texture and a hint of bitterness that cuts through the sweetness. The cream’s lightness lifts the custard, while the chocolate shavings provide a satisfying snap. If you’re looking for a vegan version, replace the whipped cream with coconut cream and use dark chocolate shavings.
Everything’s prepped? Good. Let’s get into the real action and bring that custard to life.
The Method — Step by Step
- Start by whisking together the milk, cornstarch, and a pinch of sea salt in a medium saucepan. The goal is to create a smooth, lump‑free mixture. Keep the heat at medium; you want it to warm without boiling. This step sets the foundation for a silky custard.
- Add the chopped bananas to the saucepan. Stir gently until the fruit is fully incorporated and the mixture begins to thicken slightly. The banana’s natural sugars caramelize as they heat, adding depth to the custard. Don’t rush this step; let the bananas release their juice slowly.
- In a separate bowl, whisk the egg yolks with the granulated sugar until the mixture is pale and smooth. This creates a uniform base that will blend seamlessly with the milk. If you notice any lumps, strain the mixture through a fine sieve.
- Slowly pour the egg yolk mixture into the saucepan, whisking constantly to prevent curdling. The mixture should be hot enough to thicken but not so hot that the eggs scramble. Keep the heat low and stir until the custard coats the back of a spoon.
- Add the butter and vanilla extract to the saucepan. The butter melts into the custard, giving it a glossy sheen and a buttery finish. Stir until the butter is fully incorporated, ensuring no lumps remain.
- Remove the saucepan from the heat and let the custard sit for a minute to cool slightly. This pause allows the flavors to meld together and prevents the custard from becoming too thick when poured.
- Transfer the custard into individual serving dishes or a large bowl. If you’re serving immediately, spoon the custard into cups or ramekins and top with a dollop of whipped cream.
- Sprinkle chocolate shavings over the top for a hint of bitterness that cuts through the sweetness. The shavings add a crunchy contrast that elevates the overall texture.
- Let the custard chill in the refrigerator for at least 30 minutes before serving. This step allows the custard to set fully and develop a firmer consistency.
That’s it — you did it. But hold on, I’ve got a few more tricks that’ll take this to another level. From the way you whisk to the final garnish, every detail is designed to elevate the experience.
Insider Tricks for Flawless Results
The Temperature Rule Nobody Follows
Maintaining the right temperature is crucial. If the milk is too hot, the eggs will scramble; if it’s too cool, the custard won’t set. The sweet spot is around 80°C (176°F). Use a kitchen thermometer to keep the temperature steady, and if you’re feeling adventurous, try a double‑boiler to maintain even heat.
Why Your Nose Knows Best
Before you pour the custard into the dish, give it a sniff. If it smells like caramelized bananas, you’re on the right track. A faint vanilla aroma should also be present. If you notice a sour or metallic scent, the custard has gone bad or the eggs were old.
The 5-Minute Rest That Changes Everything
After removing the custard from the heat, let it sit for five minutes. This brief rest allows the flavors to meld and the custard to thicken slightly, preventing a runny consistency when you serve it. A friend once skipped this step and the custard turned out thin; the lesson was clear.
The Secret of the Butter
Adding butter at the end, rather than at the beginning, gives the custard a glossy finish and prevents it from becoming too thick. If you prefer a richer taste, use a tablespoon of clarified butter for a buttery, silky texture.
The Quick Chill Trick
Place the custard dishes in an ice bath for five minutes before refrigerating. This rapid cooling step ensures a smooth, firm set and reduces the risk of a watery bottom. It’s a small step that makes a big difference.
Creative Twists and Variations
This recipe is a playground. Here are some of my favorite ways to switch things up:
Caramelized Banana Crunch
Add a tablespoon of brown sugar to the banana mixture and sauté until caramelized before adding the milk. The caramel adds a nutty sweetness that pairs beautifully with the custard. Top with toasted almonds for extra crunch.
Coconut Banana Delight
Replace the milk with coconut milk and add a splash of coconut rum for an exotic twist. The coconut flavor complements the banana, creating a tropical dessert that feels like a vacation.
Chocolate Banana Fusion
Stir in a tablespoon of dark chocolate into the custard while it’s still warm. The chocolate melts into the custard, giving a silky chocolate flavor that’s not overpowering. Finish with a drizzle of chocolate sauce.
Berry Banana Surprise
Fold in fresh berries after the custard has set. The berries add a burst of tartness that balances the sweetness of the banana. A spoonful of berry compote on top gives a vibrant color and extra flavor.
Vegan Banana Custard
Swap the eggs for a flaxseed mixture (1 tablespoon flaxseed meal + 3 tablespoons water). Use oat milk and coconut cream for a dairy‑free version. The texture is slightly thicker, but the flavor remains indulgent.
Storing and Bringing It Back to Life
Fridge Storage
Store the custard in an airtight container in the refrigerator for up to 48 hours. The custard will firm up slightly, so let it sit at room temperature for 10 minutes before serving to restore its silky consistency. A small splash of milk can help revive the texture if it has become too thick.
Freezer Friendly
For longer storage, freeze the custard in individual portions. Use a freezer‑safe container and leave a little headspace for expansion. Thaw in the refrigerator overnight, then gently warm on the stove or in a microwave before serving.
Best Reheating Method
Reheat the custard gently over low heat, stirring constantly. Adding a splash of water or milk before reheating creates steam that brings the custard back to its original silky texture. Avoid boiling, or the custard will separate.