I was in the middle of a midnight snack experiment when the kitchen turned into a battlefield. The onions were caramelizing faster than I could stir, and the sweet scent of honey was already permeating the air. I stared at the bubbling pot, realizing that something was about to happen that would change how I think about comfort food forever. The sizzling sound was like a drumroll, building anticipation for what was to come. I was about to discover a flavor combination that would make my taste buds do a happy dance. The moment the honey drizzled into the caramel, a golden glaze began to form, promising something truly special.
Picture the kitchen as a stage, the onions the lead actors, the honey the spotlight that turns everything into gold. The aroma of slowly caramelized onions rises in a syrupy cloud, mingling with the sharp tang of apple cider vinegar and the savory depth of soy sauce. The sound of the onions crackling is a comforting soundtrack, while the heat of the skillet feels like a warm hug. When the chicken meets the glaze, it releases a faint hiss, a cue that the magic is underway. Every sense is engaged: the visual of a glossy coating, the fragrant promise of chestnuts, the tactile feel of a sizzling pan.
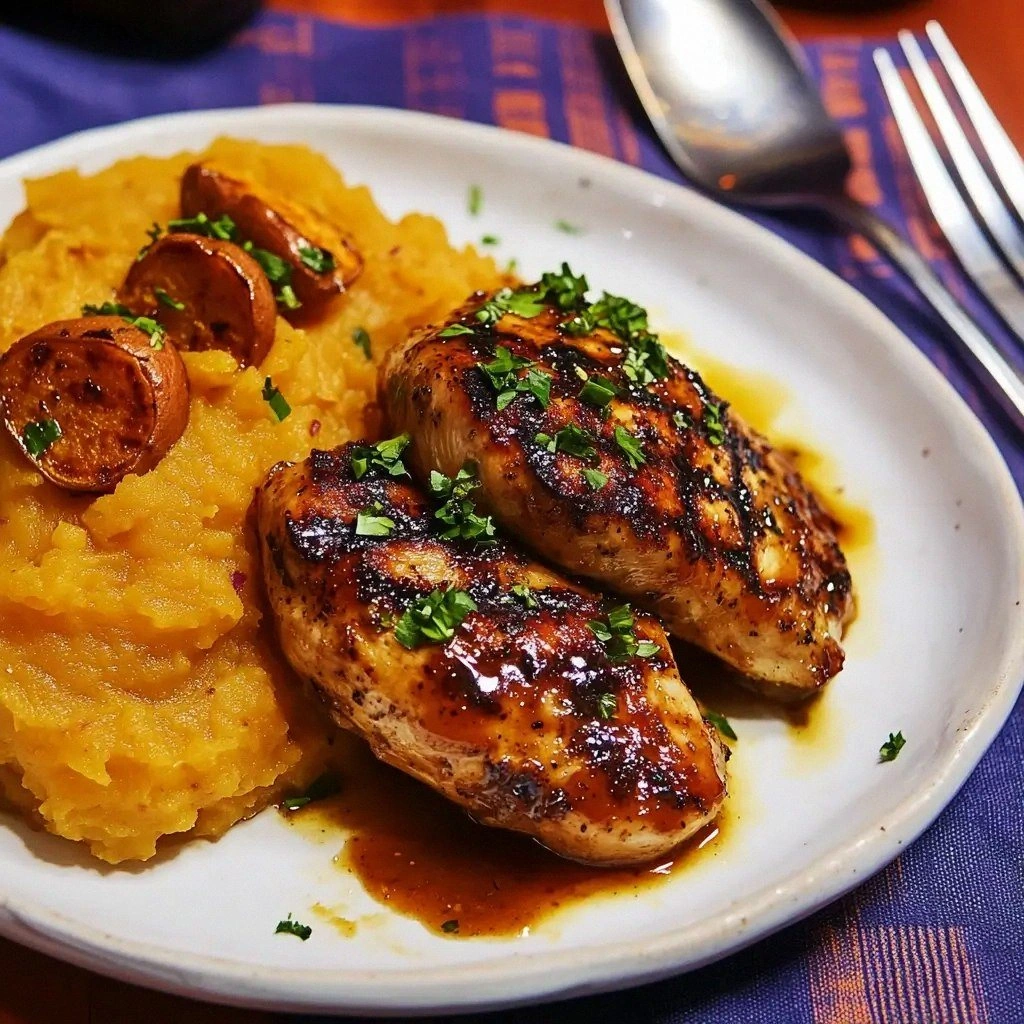
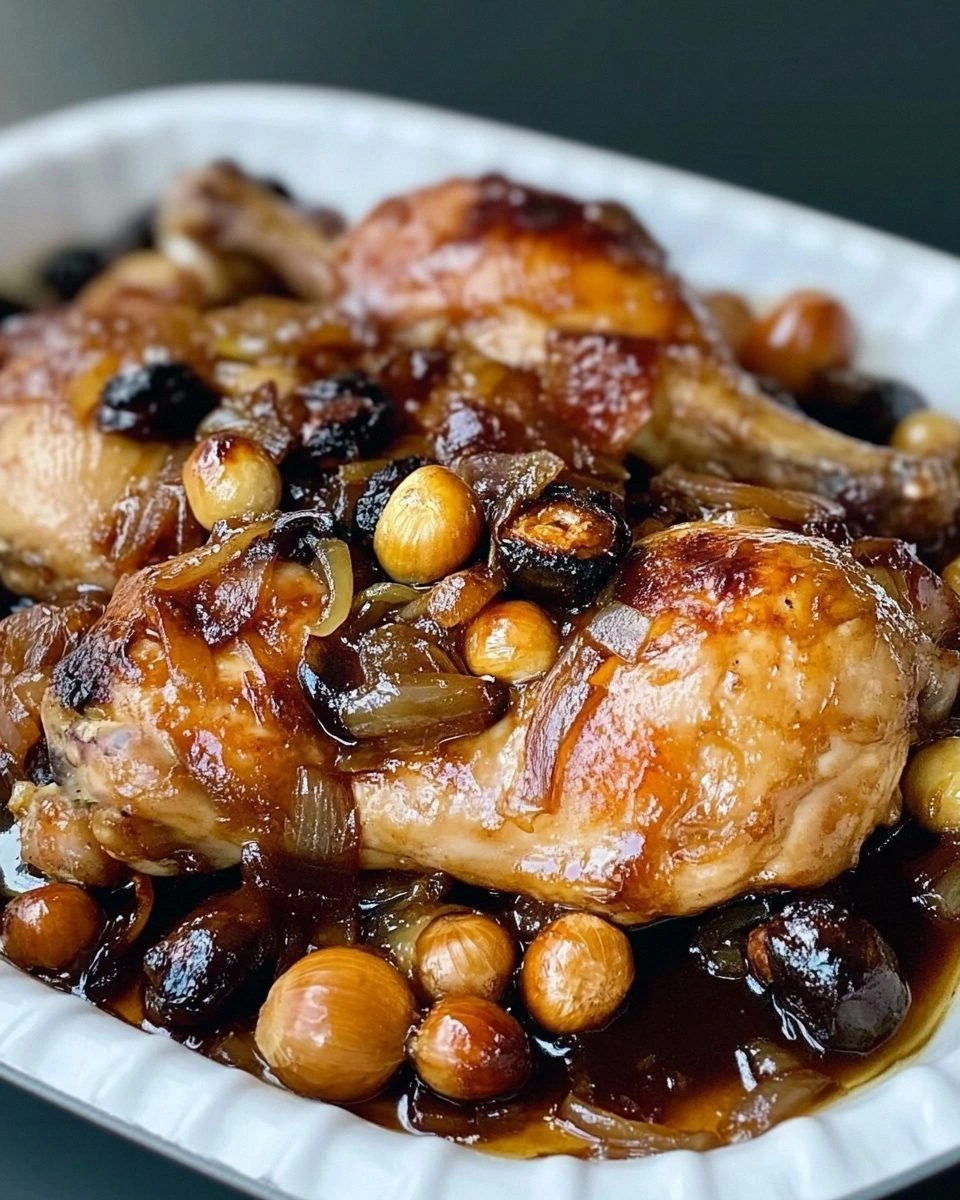
What makes this version stand out is that it isn’t just caramelized onions and honey; it’s a layered, symphonic experience that balances sweet, savory, and umami. The honey is not merely a sweetener; it acts as a binder, allowing the glaze to cling to the chicken and chestnuts with a silky finish. The chestnuts provide a chewy, nutty counterpoint that cuts through the richness. The soy sauce introduces depth, while the apple cider vinegar brightens the dish with a subtle acidity that prevents the honey from becoming cloying. The result is a dish that feels both indulgent and sophisticated, a single pan meal that delivers restaurant-quality flavor.
I dare you to taste this and not go back for seconds. The first bite is a burst of caramelized onion sweetness, followed by the tender chicken, the earthy chestnut, and the finishing splash of soy. The glaze coats the chicken like velvet, and the chestnuts add a delightful crunch that shatters like thin ice. The dish is hands down the best version you'll ever make at home, and it’s so simple you’ll wonder how you ever cooked anything else. I’ll be honest — I ate half the batch before anyone else got to try it, and my friends are still asking for the recipe.
Most recipes get this completely wrong, focusing on either caramelizing the onions or glazing the chicken, but not both in harmony. The secret lies in timing and temperature; you need to let the onions develop a deep amber color before adding the honey, and then let the glaze reduce just enough to coat the chicken without burning. Picture yourself pulling this out of the oven, the whole kitchen smelling incredible, and a crowd of friends gathering around to dig in. Okay, ready for the game-changer? Let me walk you through every single step — by the end, you'll wonder how you ever made it any other way.
What Makes This Version Stand Out
- Flavor: The caramelized onions and honey create a deep, sweet-salty base that pairs perfectly with savory chicken. The honey’s natural sugars caramelize into a glossy glaze that coats the meat and chestnuts with a silky sheen. This combination elevates a simple dish into a gourmet experience.
- Texture: The onions become buttery and tender, while the chestnuts add a chewy crunch that contrasts with the juicy chicken. The glaze sets into a thin film that locks in moisture, preventing the chicken from drying out.
- Simplicity: All the work happens in one pan, so you can clean up in a flash. The recipe requires only a handful of pantry staples, making it a go-to for busy weeknights.
- Uniqueness: The addition of smoked paprika and a splash of soy sauce gives the dish a smoky, umami depth that sets it apart from typical honey-glazed chicken recipes.
- Crowd Reaction: Friends rave about the glossy glaze and the unexpected chestnut bite, saying it feels like a fancy dinner but with no fuss.
- Ingredient Quality: Using fresh, high-quality onions and honey makes all the difference; a cheap honey will taste flat, while a good one adds floral nuances.
- Cooking Method: The technique of caramelizing first, then glazing, ensures the flavors meld without burning, a method that takes your cooking to the next level.
- Make‑ahead Potential: The dish can be cooked ahead and reheated with a splash of water to keep it moist, making it perfect for meal prep.
Inside the Ingredient List
The Flavor Base
Onions are the foundation of this dish, providing a sweet, aromatic base that caramelizes into a golden brown. Thinly sliced, they release their natural sugars slowly, allowing the honey to bind without burning. If you skip onions, the dish loses its depth and becomes a plain glaze on chicken. For a milder flavor, try using Vidalia onions instead of standard white onions. When selecting onions, look for firm, unblemished skins and avoid any that feel soft or have dark spots.
Honey is the secret sweetener that turns the sauce into a glossy, mouth‑watering glaze. A light or amber honey works best, as darker varieties can overpower the delicate flavors. If you can’t find honey, a small amount of maple syrup can be a close substitute, though it will alter the final taste slightly. When buying honey, choose raw, unfiltered honey for the richest flavor profile.
The Texture Crew
Chestnuts add a satisfying chew and a subtle nutty flavor that complements the sweetness of the honey. Toasted chestnuts bring out their natural sweetness and add a smoky undertone. If you’re using canned chestnuts, rinse them well and pat dry before adding to the pan to avoid excess moisture. For a budget-friendly alternative, use roasted pecans or walnuts, though the flavor will shift slightly.
Chicken breasts or thighs provide the protein backbone of the dish. Boneless, skinless chicken breasts cook quickly and remain tender when glazed. If you prefer a richer flavor, choose thighs with skin; just trim off excess fat after cooking to keep the dish balanced. When selecting chicken, look for a firm texture and a light pink color without any discoloration.
The Unexpected Star
Soy sauce adds an umami punch that balances the sweetness of honey and the acidity of vinegar. A light soy sauce keeps the dish from becoming too salty, while a dark soy sauce would deepen the flavor but add a darker color. If you’re gluten‑free, opt for tamari or a gluten‑free soy sauce. The acidity from apple cider vinegar brightens the glaze, preventing the honey from becoming syrupy.
Garlic and thyme bring aromatic depth. Minced garlic releases its fragrance early, infusing the oil and onions. Dried thyme offers a subtle piney note that complements the chestnuts. If you’re allergic to garlic, you can omit it, but the dish will lose a layer of complexity. For a more robust herb profile, add rosemary or bay leaves.
The Final Flourish
Butter, olive oil, and a splash of chicken broth create a silky sauce that clings to the chicken and chestnuts. The butter adds a rich finish, while the olive oil provides a smooth base for the caramelization. A splash of broth keeps the chicken moist and adds a subtle savory note. Salt and pepper to taste are essential for bringing all the flavors together; remember that soy sauce already contributes salt, so adjust accordingly. Smoked paprika is optional but adds a smoky aroma that enhances the overall profile.
Everything’s prepped? Good. Let’s get into the real action…
The Method — Step by Step
- Heat a large skillet over medium heat and add the olive oil. As the oil warms, add the thinly sliced onions and a pinch of salt. Stir occasionally, allowing the onions to soften and begin to caramelize. Watch for the first golden blush; this indicates the sugars are starting to develop. The onions should not burn; lower the heat if they darken too quickly. When they’re translucent and fragrant, move to the next step.
- Add the minced garlic and thyme to the pan, letting them sauté for about 30 seconds. The garlic releases its aroma, while the thyme infuses the oil. Keep the heat at medium to avoid burning the garlic. Stir constantly to prevent sticking. The mixture should smell like a fresh herb garden. This brief sauté adds a fragrant foundation to the sauce.
- Pour in the soy sauce and apple cider vinegar, stirring to combine. The liquid should reduce slightly, forming a thin glaze. Allow the mixture to simmer for 2–3 minutes until it thickens a little. The reduction concentrates the flavors, creating a balanced sweet‑savory base. Keep the heat moderate; a rolling boil will scorch the honey later. The pan should have a glossy sheen, signaling readiness.
- Add the chicken breasts to the skillet, skin‑side down if using thighs. Sear each side for 3–4 minutes until a golden crust forms. The sear locks in juices and gives the chicken a savory base. Flip carefully, allowing the glaze to coat the other side. The chicken should not be fully cooked at this point; it will finish in the oven. The aroma of seared meat will mingle with the caramelized onions.
- Stir in the honey, chestnuts, and a splash of chicken broth. The honey will coat the chicken, chestnuts, and onions, forming a glossy glaze. The broth adds moisture, preventing the dish from drying out during baking. Stir gently to distribute the glaze evenly. The mixture should thicken into a syrupy coating that clings to the chicken. Keep the heat low to avoid burning the honey.
- Transfer the skillet to a preheated oven at 375°F (190°C) for 15–20 minutes. The chicken should reach an internal temperature of 165°F (74°C). The glaze will caramelize further, creating a caramelized crust. The chestnuts will toast slightly, enhancing their nutty flavor. Remove the skillet, and let the chicken rest for 5 minutes to redistribute juices.
- While the chicken rests, reduce the remaining glaze on the stove over low heat until it reaches a syrupy consistency. This will intensify the flavor and ensure a glossy coating. Stir constantly to prevent scorching. The glaze should be thick enough to coat a spoon but still pourable. A thin glaze will cling to the chicken without dripping off. The final glaze will be the star of the dish.
- Return the glazed chicken to the skillet, spooning the thickened glaze over each piece. The glaze should coat the chicken like a glossy coat of armor. Serve immediately, garnishing with fresh thyme leaves if desired. The dish is best enjoyed hot, with a side of roasted vegetables or a simple green salad. The aroma alone will have your guests begging for seconds.
That’s it — you did it. But hold on, I've got a few more tricks that'll take this to another level…
Insider Tricks for Flawless Results
The Temperature Rule Nobody Follows
Many cooks over‑cook their chicken by cooking it at a high temperature, which dries out the meat. The trick is to sear the chicken first, then finish it at a moderate oven temperature of 375°F (190°C). This method locks in moisture while allowing the glaze to caramelize. I once tried baking at 425°F, and the result was a rubbery texture that ruined the dish. Keep the oven at 375°F and trust the process.
Why Your Nose Knows Best
Before you add the honey, give the pan a sniff. A sweet, caramel aroma is a sign that the onions are ready. If the scent is sharp or metallic, the onions are over‑cooked. Your nose can guide you to the perfect caramelization point. I always keep a small bowl of water on the stove; if the onions start to stick, the water will help loosen them.
The 5‑Minute Rest That Changes Everything
Letting the chicken rest for 5 minutes after baking allows the juices to redistribute. This simple step makes the meat tender and juicy. Many people skip this step, leading to dry chicken. I always set a timer for 5 minutes and then plate the dish right after, ensuring maximum moisture.
Use a Skillet with a Lid for Even Cooking
Covering the skillet traps steam, which helps cook the chicken evenly and keeps the glaze from drying out. If you’re using a non‑stick skillet, a lid will also prevent the honey from burning. I’ve found that a heavy‑bottomed skillet with a tight‑fitting lid works best for this recipe.
Make It Ahead and Reheat with a Splash of Water
Cook the dish ahead of time and store it in an airtight container. When reheating, add a splash of water or broth and cover to keep the glaze moist. This trick restores the dish’s glossy finish without overcooking the chicken. I keep leftovers in the fridge for up to 3 days and reheat them on the stove for a few minutes.
Use Fresh Herbs Instead of Dried for Extra Flavor
Fresh thyme or rosemary can elevate the dish’s aroma and taste. While dried herbs are convenient, they lack the bright, green notes that fresh herbs bring. If you’re making this for a special occasion, swap dried thyme for fresh sprigs and let them steep in the glaze.
Creative Twists and Variations
Smoky Chipotle Version
Swap the smoked paprika for chipotle powder and add a splash of adobo sauce. The smoky heat will pair beautifully with the honey glaze. This version is perfect for a spicy dinner party and brings a Latin flair to the dish.
Herb‑Infused Delight
Replace thyme with a blend of rosemary, oregano, and basil. The herbal bouquet adds depth and complexity. This variation is ideal for a Mediterranean‑inspired menu.
Sweet & Tangy Citrus Twist
Add a squeeze of fresh orange or lemon juice to the glaze. The citrus brightens the sweetness of the honey and cuts through the richness. This version is especially refreshing during warmer months.
Vegetarian Option
Use firm tofu or tempeh instead of chicken. Marinate the tofu in soy sauce and honey before sautéing, then follow the same steps. The result is a plant‑based dish that still delivers that glossy, caramelized finish.
Gluten‑Free Alternative
Replace soy sauce with tamari and use a gluten‑free honey if you’re sensitive. The flavor remains intact while keeping the dish safe for gluten‑free diners. I’ve used this version for a gluten‑free dinner party with great success.
Low‑Carb Version
Omit the honey or replace it with a sugar‑free sweetener like monk fruit. The glaze will still be glossy, but the carb count drops significantly. This tweak makes the dish suitable for keto or low‑carb diets.
Storing and Bringing It Back to Life
Fridge Storage
Cool the dish completely before transferring it to a sealed container. Store in the refrigerator for up to 3 days. When ready to serve, reheat on the stove over low heat, adding a splash of water to keep the glaze moist. The dish remains tender and flavorful.
Freezer Friendly
Pack the dish in a freezer‑safe container and freeze for up to 2 months. Thaw overnight in the fridge, then reheat on the stove with a little broth. The glaze will regain its glossy sheen, and the chicken will stay juicy.
Best Reheating Method
Reheat the dish in a covered skillet over low heat, stirring occasionally. Add a tablespoon of water or broth to prevent the glaze from drying out. The dish will heat evenly, and the glaze will become silky and glossy again. Avoid microwaving, as it can make the glaze sticky.