I was standing in my kitchen, staring at a pile of frozen turkey legs, when my phone buzzed with a frantic text from a friend: “I need a dinner that can be ready in 30 minutes, no fuss, and still taste like a feast.” I stared at the clock, my mind racing through a thousand possibilities, and then remembered the one thing that always saves the day: the air fryer. The idea of crispy, juicy turkey legs, seasoned to perfection and cooked in a fraction of the time, sounded too good to be true—until I tried it. What I discovered was a recipe that turns a humble protein into a showstopper, with a coating that shatters like thin ice and a flavor that lingers like a favorite memory. If you’re tired of the same old turkey, this is the version that will blow your expectations and leave you begging for seconds.
Picture the aroma of garlic and rosemary swirling through the air, the sound of the air fryer humming like a contented beast, and the sight of golden, crackling skin that invites you to dig in. The texture is a study in contrasts: the outer crust is a crisp, caramelized shell, while the meat inside remains tender and moist, practically falling apart with each bite. I dare you to taste this and not go back for seconds, because the combination of sweet brown sugar and savory spices creates a flavor profile that feels like a holiday dinner on a weekday. I’ll be honest—once I took that first bite, I ate half the batch before anyone else even had a chance to try it. But that’s the beauty of this recipe: it’s so good that you’ll want to share it, and it’s so simple that you can make it in the middle of a hectic week.
What sets this version apart from every other turkey leg recipe out there is the secret blend of seasonings that works on both the surface and the interior. The garlic powder and garlic salt combine to give a punch of umami that cuts through the richness of the meat, while the seasoned pepper adds a subtle heat that keeps the dish balanced. The brown sugar doesn’t just sweeten; it caramelizes, creating a glossy glaze that locks in moisture and adds a hint of caramel that is simply irresistible. And the fresh rosemary? It’s not just a garnish—it penetrates the meat, infusing it with an herbal aroma that elevates the entire dish. Most recipes get this completely wrong by overcooking or under-seasoning; here, every element is calibrated to produce a mouthwatering result.
I’m not just telling you about the flavor; I’m giving you a sneak peek into the technique that keeps the turkey legs tender without a single drop of oil. The air fryer’s rapid circulation of hot air creates a Maillard reaction on the surface, giving you a crispy edge that shatters like thin ice, while the interior stays juicy. I’ll walk you through the exact timing and temperature settings that make this possible, so you can replicate the same magic at home. And the best part? You’ll never have to worry about a greasy mess or a stovetop that needs constant stirring. So, if you’ve ever struggled with turkey legs, you’re not alone—this recipe is the fix you’ve been searching for.
Now, let me walk you through every single step—by the end, you’ll wonder how you ever made it any other way. Picture yourself pulling this out of the air fryer, the whole kitchen smelling incredible, and your guests lining up for a plate. This is hands down the best version you'll ever make at home, and I’m about to show you why. Get ready for a culinary adventure that’s as satisfying to make as it is to eat.
What Makes This Version Stand Out
- Taste: The blend of sweet brown sugar, aromatic rosemary, and savory garlic creates a flavor profile that feels like a holiday feast in a single bite.
- Texture: A crisp, caramelized crust that shatters like thin ice, paired with a moist, tender interior that practically melts in your mouth.
- Simplicity: No deep-frying, no complicated prep—just a handful of pantry staples and an air fryer.
- Crowd Appeal: The dish is perfect for family dinners, potlucks, or a quick weekday meal that impresses everyone at the table.
- Ingredient Quality: Fresh rosemary and high‑quality turkey legs elevate the dish beyond ordinary comfort food.
- Cooking Method: The air fryer’s rapid air circulation delivers restaurant‑level crispness while keeping the meat juicy.
- Make‑ahead: You can season the legs a day ahead, refrigerate them, and cook them on the day you need a quick dinner.
Alright, let's break down exactly what goes into this masterpiece...
Inside the Ingredient List
The Flavor Base
At the heart of this dish is a simple yet powerful mixture of garlic powder, garlic salt, and seasoned pepper. Garlic powder provides a deep, aromatic foundation that permeates the meat, while garlic salt adds a salty punch that balances the sweetness of the brown sugar. Seasoned pepper introduces a subtle heat that keeps the flavor profile from becoming one‑dimensional. If you skip any of these, the result will feel flat and lacking depth. For those who prefer a more complex profile, a pinch of smoked paprika can add a smoky undertone without overwhelming the dish.
The Texture Crew
Brown sugar is the secret to that glossy, caramelized glaze that clings to the turkey legs. When heated, sugar undergoes the Maillard reaction, forming a golden crust that locks in moisture. Without it, the legs will still be tasty but will lack that irresistible caramel sheen. If you’re watching calories, a tablespoon of honey or maple syrup can be a sweet substitute, though the caramelization will differ slightly. Keep in mind that the sugar will brown quickly, so watch it closely during the final minutes of cooking.
The Unexpected Star
Fresh rosemary is more than a garnish—its resinous, pine‑like aroma infuses the meat from the inside out. Rosemary’s natural oils help to keep the turkey moist and add a fragrant note that pairs beautifully with the sweet glaze. If you can’t find fresh rosemary, dried rosemary will work, but use only half the amount to avoid bitterness. For an even more aromatic experience, try adding a sprig of thyme or a few bay leaves during the cooking process.
The Final Flourish
Olive oil spray is the final touch that ensures the coating adheres to the meat and promotes even browning. The spray format keeps oil usage minimal, preventing excess greasiness while still providing a crisp surface. If you prefer a richer flavor, a light brush of olive oil works just as well, but be careful not to over‑saturate the legs. The olive oil also helps to carry the spices into the meat’s fibers, creating a uniform taste experience.
Everything's prepped? Good. Let's get into the real action...
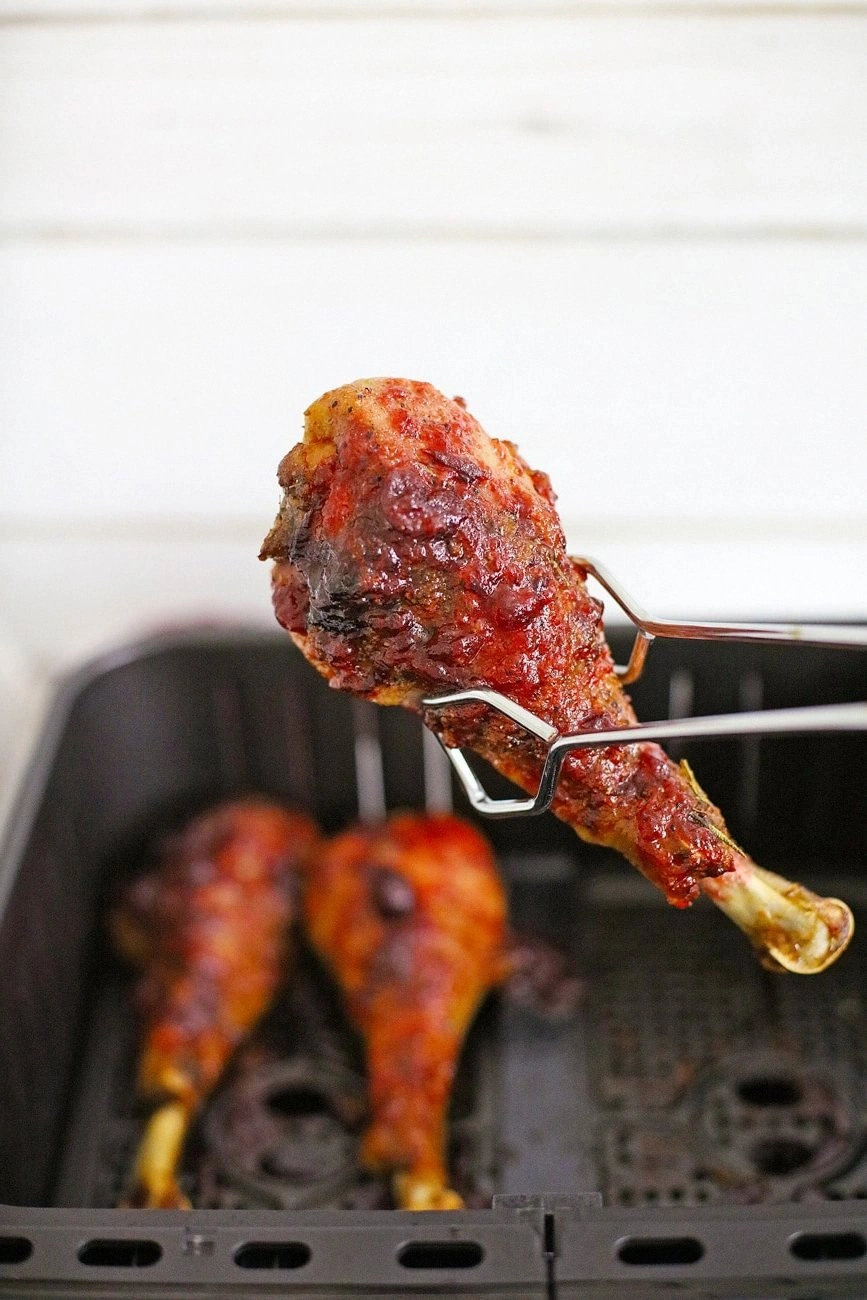
The Method — Step by Step
- Preheat your air fryer to 375°F (190°C) for about 3 minutes. The appliance should emit a warm, slightly metallic hum that signals readiness. This preheating step ensures a consistent cooking environment and helps the turkey legs develop a crisp exterior from the start. If you skip preheating, you’ll notice uneven browning and a longer overall cooking time. Keep a close eye on the first few minutes to gauge the airflow.
- While the air fryer warms, pat the turkey legs dry with paper towels. Removing excess moisture is essential because it prevents steam from forming on the surface, which would inhibit crisping. A dry surface allows the seasonings to adhere better, creating an even flavor coating. If you’re in a rush, a quick rinse under cold water followed by thorough drying works too. This step may feel tedious, but the payoff is a superior crust.
- In a bowl, combine olive oil spray, garlic powder, garlic salt, seasoned pepper, brown sugar, and fresh rosemary. Mix until the mixture forms a thick, sticky paste that clings to the meat. This paste is the flavor base that permeates each bite, delivering depth and complexity. If you’re short on time, simply spray the legs with olive oil and sprinkle the dry spices; the result will still be delicious, though the glaze may be less pronounced. The paste also helps the sugar caramelize evenly across the surface.
- Coat each turkey leg thoroughly with the paste, ensuring every crevice receives a generous layer. The coating not only adds flavor but also forms the protective crust that seals in juices. If you notice any bare spots, reapply a thin layer of paste to guarantee uniformity. The more even the coating, the more consistent the caramelization across all legs. This step is where you can really get creative—add a pinch of smoked paprika for a subtle smokiness.
- Place the legs in the air fryer basket in a single layer, ensuring they do not touch. Overcrowding reduces airflow, leading to uneven cooking and a soggy texture. Watch Out: If the legs are too close, the steam will accumulate, preventing the surface from crisping properly. Arrange them in a way that allows the hot air to circulate freely around each piece. This simple arrangement can make the difference between a perfect crisp and a mediocre one.
- Cook for 20 minutes, then flip the legs and cook for an additional 10 minutes. At the 30‑minute mark, check the internal temperature; it should reach 165°F (74°C). The first 20 minutes allow the exterior to caramelize, while the final 10 minutes finish cooking the interior. If the crust isn’t crisp enough, add 2 more minutes and keep a close eye on the color. The aroma at this point should be rich and inviting, signaling that the meat is nearly ready.
- Remove the legs and let them rest for 5 minutes. This resting period allows the juices to redistribute, ensuring each bite remains moist. The residual heat will continue to cook the meat slightly, bringing the internal temperature to the perfect level. During this time, the glaze will set, creating a glossy finish that’s a feast for the eyes. If you’re in a hurry, you can skip the rest, but the texture will feel slightly drier.
- Optional: Drizzle a small amount of melted butter or a splash of white wine over the legs for an extra layer of moisture and flavor. The butter adds richness, while the wine provides acidity that cuts through the sweetness. This step is not mandatory, but it elevates the dish to a gourmet level. If you’re watching calories, a light brush of butter is sufficient. The aroma of butter sizzling will fill your kitchen with pure comfort.
- Plate immediately and serve with your favorite sides. The turkey legs are at their peak when hot and fresh, so don’t let them sit too long. A simple green salad or roasted root vegetables complement the savory sweetness. If you’re hosting, consider adding a small dish of cranberry sauce for a touch of tartness. The visual contrast of the golden legs against a vibrant plate will make your guests feel like they’ve stepped into a fine dining experience.
That’s it — you did it. But hold on, I've got a few more tricks that'll take this to another level...
Insider Tricks for Flawless Results
The Temperature Rule Nobody Follows
Many people set their air fryer to 400°F, thinking higher heat always yields crispier results. In reality, a moderate 375°F balances surface caramelization with thorough cooking. Too high a temperature can burn the sugar glaze before the meat is cooked through, leading to a burnt exterior and raw interior. Keep a thermometer handy; 165°F is the safe threshold for turkey. By sticking to 375°F, you’ll consistently achieve a golden crust without sacrificing juiciness.
Why Your Nose Knows Best
Smell is a powerful indicator of doneness. As the turkey cooks, the aroma of caramelized sugar and roasted rosemary will intensify. When you notice a warm, sweet scent that’s not overpowering, it’s a good sign that the glaze is forming correctly. If the smell is too sharp or burnt, pull the legs out immediately to prevent a bitter finish. Your nose can guide you to the perfect finish more reliably than a clock.
The 5-Minute Rest That Changes Everything
Resting is often overlooked, but it’s essential for juicy turkey. During the 5‑minute rest, the juices redistribute, preventing them from spilling out when you cut. The skin also firm’s up slightly, making it easier to slice. Skip this step and you’ll experience dry, uneven bites. Even if you’re short on time, a 2‑minute rest still offers noticeable benefits.
The Secret to a Crispy Skin Without Extra Oil
Drying the legs thoroughly before coating ensures the skin will crisp up without additional oil. The moisture on the surface creates steam, which can trap steam pockets and result in a soggy crust. Patting the legs dry, then allowing them to air‑dry for a few minutes in the refrigerator, maximizes crispness. This technique is especially useful if you’re using a lower‑fat turkey or a leaner cut.
How to Keep the Meat Juicy
Use a meat thermometer to monitor internal temperature. Once it hits 165°F, remove the legs immediately; overcooking will dry them out. If you’re cooking multiple batches, keep the cooked legs warm in a low‑heat oven (200°F) while you finish the rest. This prevents the outer layer from becoming overly crisp while the interior finishes cooking.
Quick Fix for Overcooked Legs
Should you accidentally overcook the legs, rescue them by slicing and serving with a sauce or gravy. A simple pan sauce made from the pan drippings, a splash of chicken broth, and a dash of lemon juice will revive the meat’s moisture. Alternatively, wrap the legs in foil and warm them gently in the oven with a bit of broth to reintroduce steam.
Creative Twists and Variations
This recipe is a playground. Here are some of my favorite ways to switch things up:
Spicy Cajun Turkey Legs
Swap the seasoned pepper for a Cajun spice blend and add a pinch of cayenne. The result is a bold, smoky heat that complements the sweet glaze. This version is perfect for those who love a kick and pairs well with a cooling cucumber yogurt dip.
Maple Glazed Turkey Legs
Replace the brown sugar with equal parts maple syrup and reduce the rosemary to a teaspoon. The maple adds a subtle sweetness and a glossy sheen. Serve with a drizzle of extra maple for an indulgent twist that pairs beautifully with roasted sweet potatoes.
Lemon Herb Turkey Legs
Add zest and juice of one lemon to the seasoning paste, and increase rosemary to two tablespoons. The bright citrus cuts through the richness, creating a refreshing contrast. This variation works wonderfully with a light salad or a quinoa pilaf.
Asian‑Inspired Soy Ginger Turkey Legs
Replace the brown sugar with honey, add 2 tablespoons of soy sauce, and incorporate 1 teaspoon grated fresh ginger. The umami and sweet balance create an Asian flair that’s surprisingly complementary. Serve over steamed rice with a side of sautéed bok choy.
Mediterranean Herb Turkey Legs
Use a mixture of dried oregano, thyme, and basil in place of fresh rosemary. Add a splash of olive oil and a pinch of lemon zest for a Mediterranean vibe. This version pairs well with a Greek salad or a side of roasted eggplant.
BBQ Twist Turkey Legs
After cooking, brush the legs with your favorite barbecue sauce and return them to the air fryer for 5 minutes to caramelize the glaze. The smoky, tangy sauce transforms the dish into a backyard classic. Pair with coleslaw and corn on the cob for a complete meal.
Storing and Bringing It Back to Life
Fridge Storage
Store leftover turkey legs in an airtight container in the refrigerator for up to 4 days. The glazed coating will stay crisp, and the meat will remain juicy. If you notice the glaze drying out, lightly drizzle a splash of broth or water before reheating.
Freezer Friendly
Wrap each leg tightly in plastic wrap and place them in a freezer bag. They’ll keep for up to 3 months without losing quality. Thaw overnight in the refrigerator before reheating to maintain texture.
Best Reheating Method
Reheat in a preheated oven at 350°F for 10–15 minutes, or until the internal temperature reaches 165°F. For extra crispness, finish on a hot grill or in the air fryer for 2 minutes. Adding a tiny splash of water before reheating steams the meat back to perfection, preventing dryness.